|
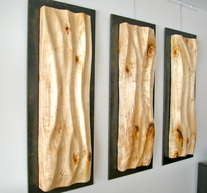
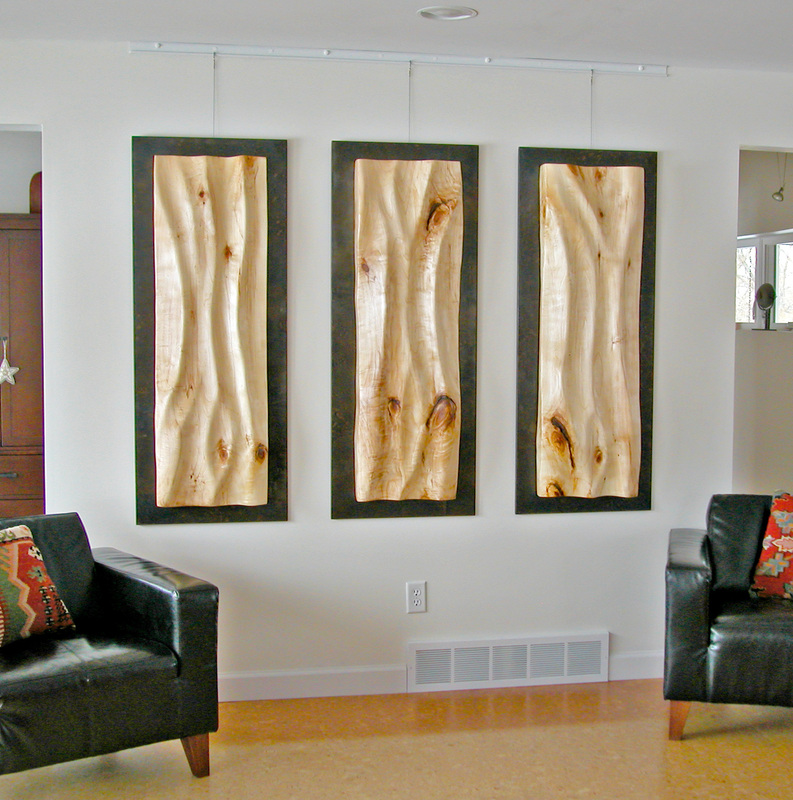
A set of Sirens is telling a tale of the tree from which it came, it is the Song of the Sirens. The closer you look the more you see in this Silver Maple triptych: 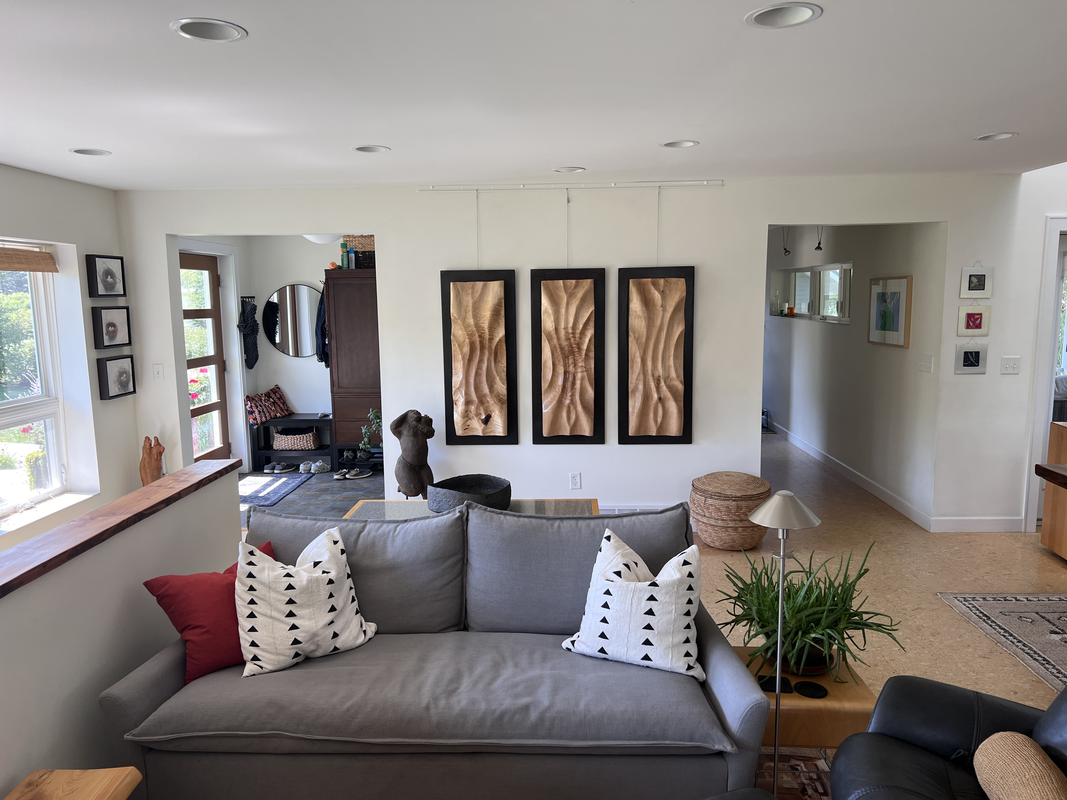 And closer still: 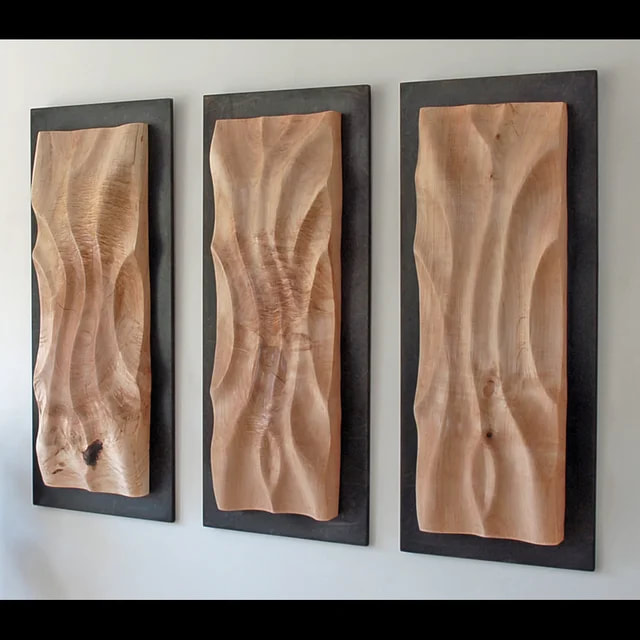 But what's that dark spot on the left panel? 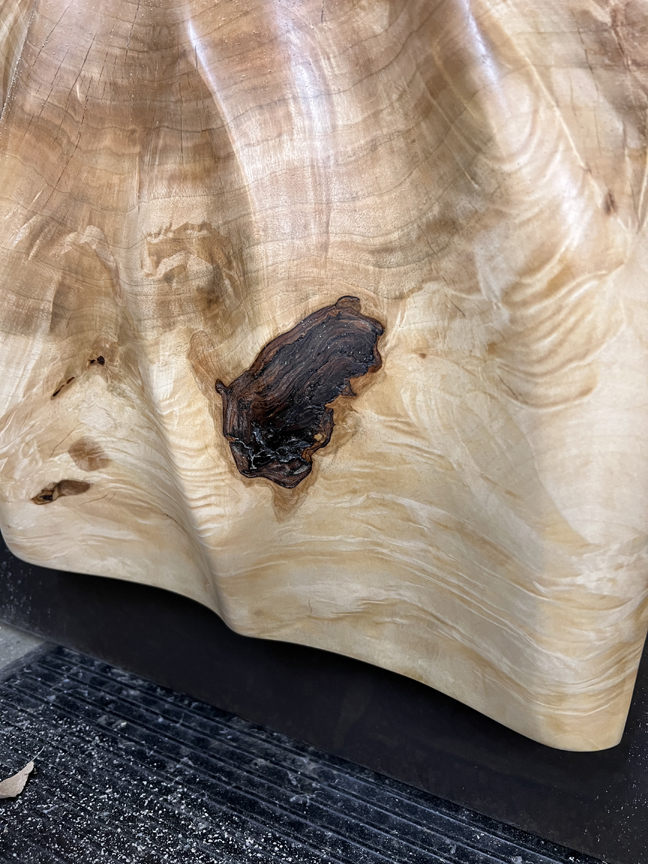 This is a great question. When I am carving large pieces from logs, I am looking for very interesting grain patterns. Generally these happen in areas of the log that are growing under pressure, or compression zones. These zones are most typically found under the forked areas in trees and under branches. In this case I was using a log that had a very large branch growing out of its center. The orientation of the panels is with the bottom/compressed side of the log to the top of the panel, this area is where there is the boldest figure. This picture below shows how the panels came out of the log, and the arrow represents the dark feature on the left panel.  You can see that I have centered the branch/knot equidistant from the bottom edge in all three pieces. In sequence here are the panels from left to right: Left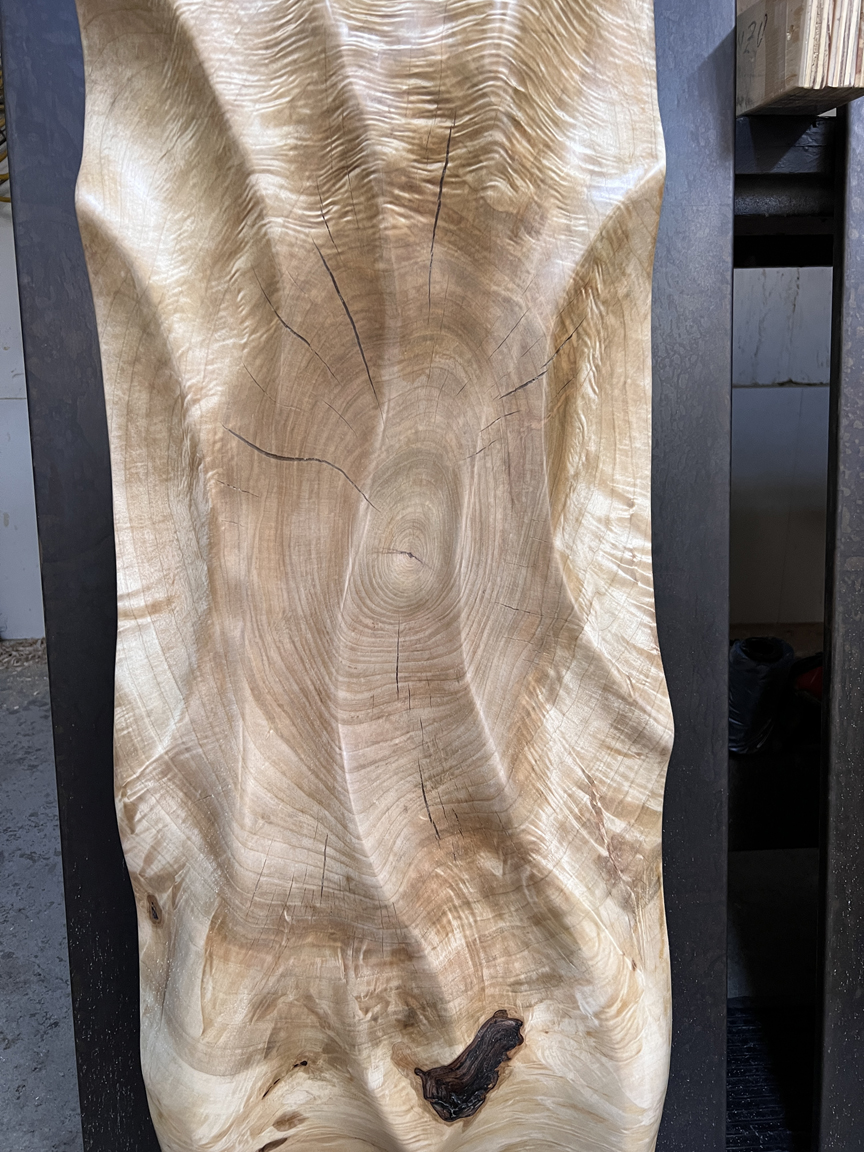 Middle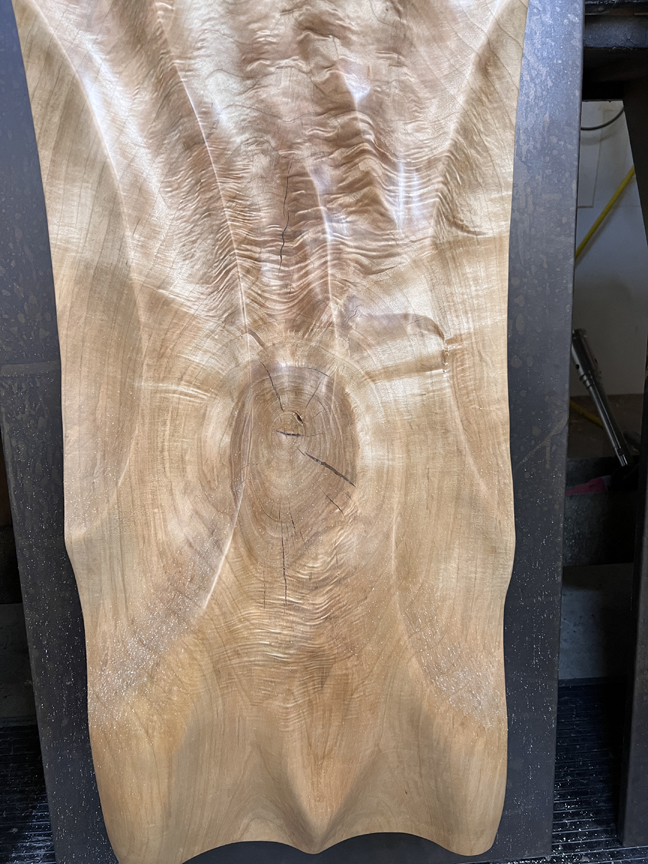 Right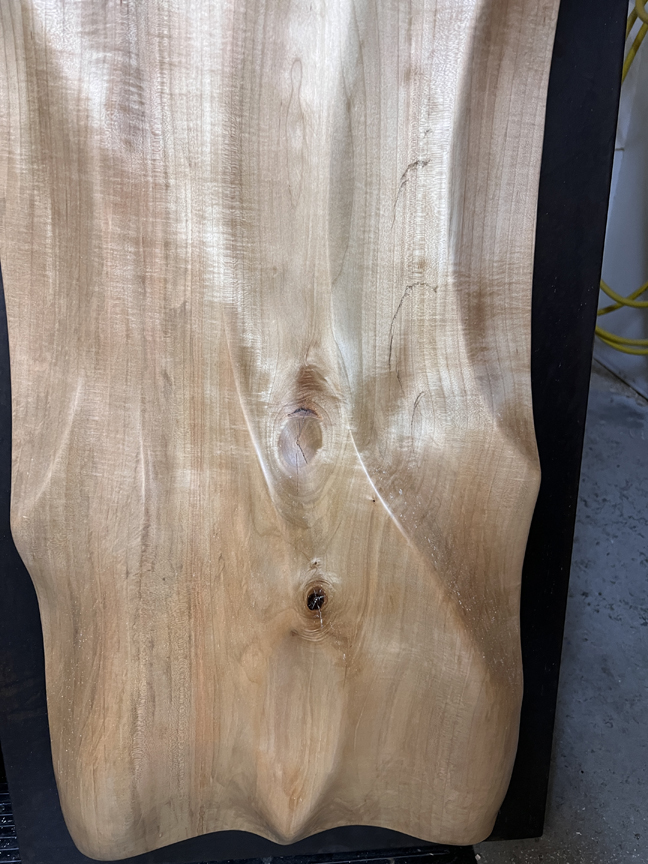 These pictures tell the story of the tree. You can see on the outer/left panel where the large branch came out of the tree when it was mature. The center panel represents the same branch, albeit smaller, when the tree was still young. And finally the right panel shows the branch not long after it first appeared on the tree. As a tree grows it adds a layer/ring to its outside. So the further you go into the log the further you excavate back to where the tree began. The curing cracks you see surrounding the branch area have been filled and stabilized with epoxy resin. The inclusions, knots, and cracks are all very deliberate elements of my sculpture. I can't control exactly how they will all fall into place but they are there by design and don't in any way compromise the integrity of the piece. The effect is to keep my work from appearing flat. 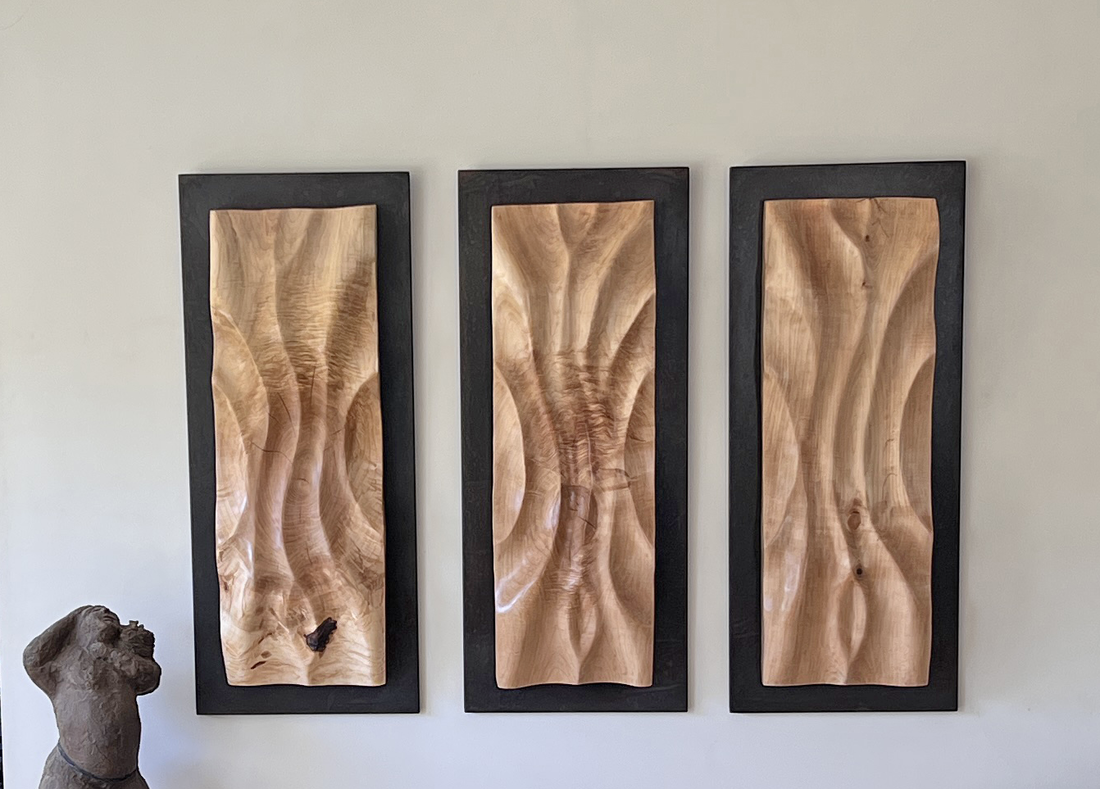
2 Comments
This is a series that covers the process of creating one of my "Five Elements". From identifying the source log to applying the final coat of oil you will come away with a new appreciation for my work. In this episode I'm back at Wildwood slabbing the logs and getting the in the Studio. Once inside I lay out and size the blanks in preparation for carving. This is a series that covers the process of creating one of my "Five Elements". From identifying the source log to applying the final coat of oil you will come away with a new appreciation for my work. In this episode I'm at the Fergus Falls landfill de-barking Elm logs and hauling them home. This is a series that covers the process of creating one of my "Five Elements". From identifying the source log to applying the final coat of oil you will come away with a new appreciation for my work. In this episode I'm at the Fergus Falls landfill scouting logs. Last spring and early summer I recorded a photo journal on my facebook page of what goes in to creating one of my larger wall triptychs. This is a compilation of that journal. I invite you to follow and "like" my facebook page - Jay McDougall - Wood Sculptor.  I'm fast-forwarding to cutting sequenced slabs from a Cottonwood log. About one out of ten logs that I look at in the field are deemed interesting enough to bring into my log yard near the studio. Hauling in a 1 or 2 ton log is far from a casual endeavor, yet until I make the initial cut the mystery remains as to whether any given log is worthy of the time I will be putting into a sculpture. In this case it's evident that I've chosen wisely. I have my large saw (122 cc/8.5hp) fitted with a 54" bar in an Alaskan mill. I will cut 3 sequenced slabs about 6" thick. 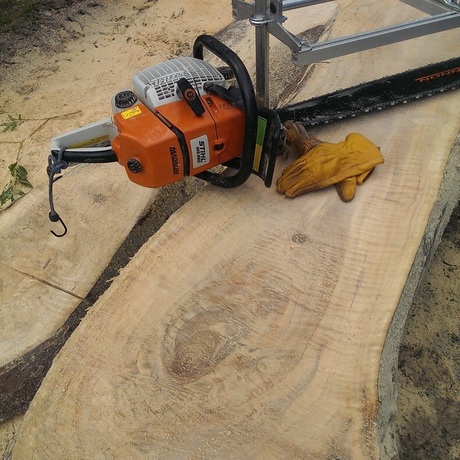 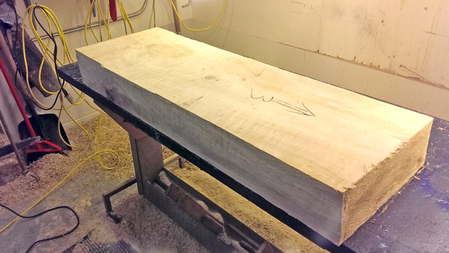 Prior to the slabs being brought in to the bench I square them with a chain saw and mark the orientation and relative sequencing. At this time the slabs are still wet/green and weigh close to 200# each. 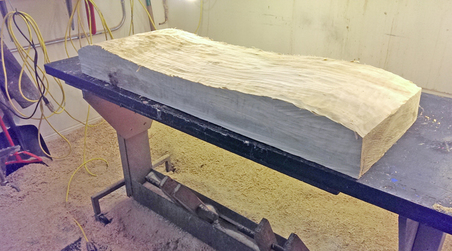 My initial carving establishes the curvature of the Siren's back. Once the curve is carved I strike some very rough lines to guide me in the carving of the figure. 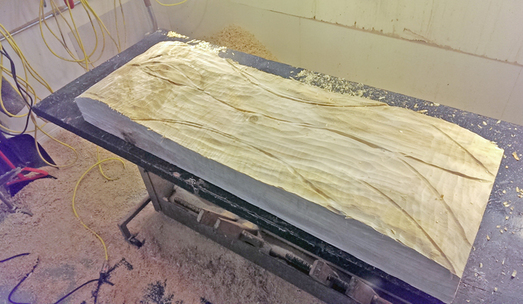 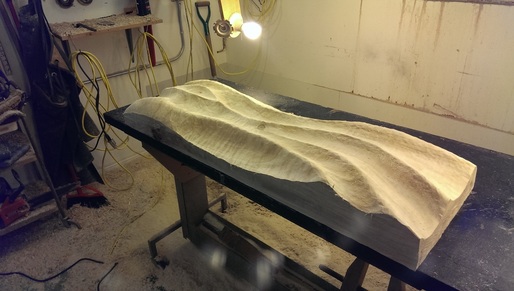 The rough carving is complete on the front of one panel. 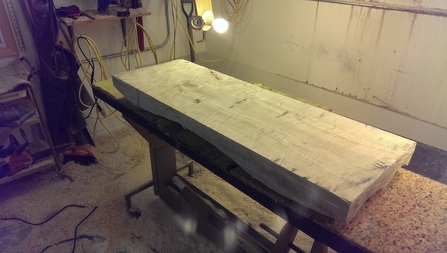 I have flipped the panel over in preparation to carve out the back side. Remember, the panel is still wet at this stage. In order for it to dry with minimal cracking or "curing checks" I must remove some thickness. As wood dries it shrinks. If a slab is too thick the inside can't keep up with the outer layer in drying/shrinking, which results in cracking. 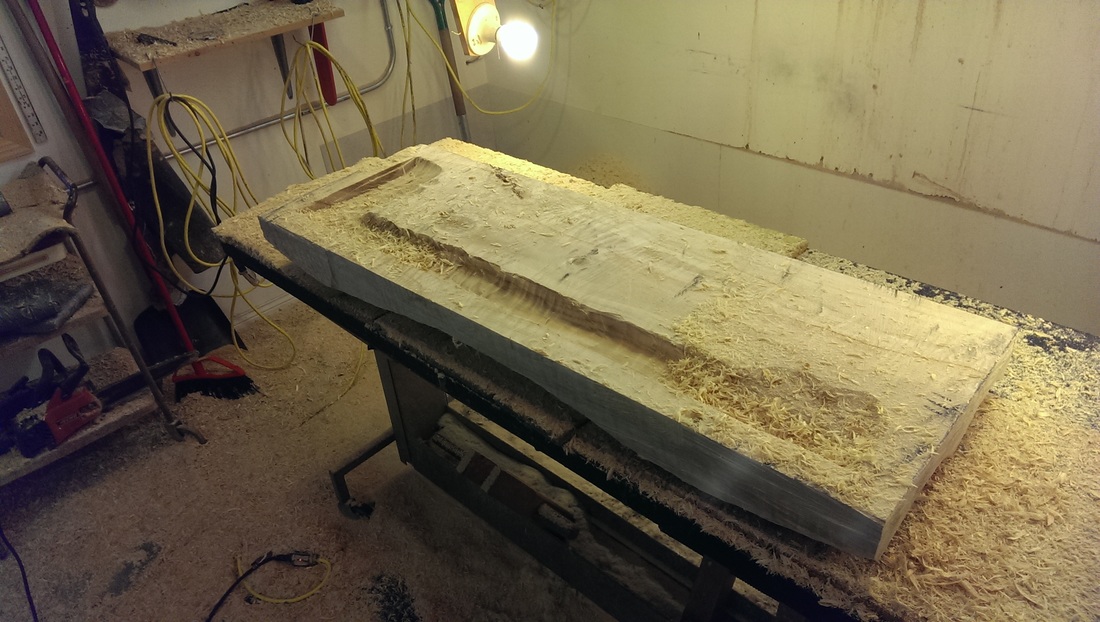 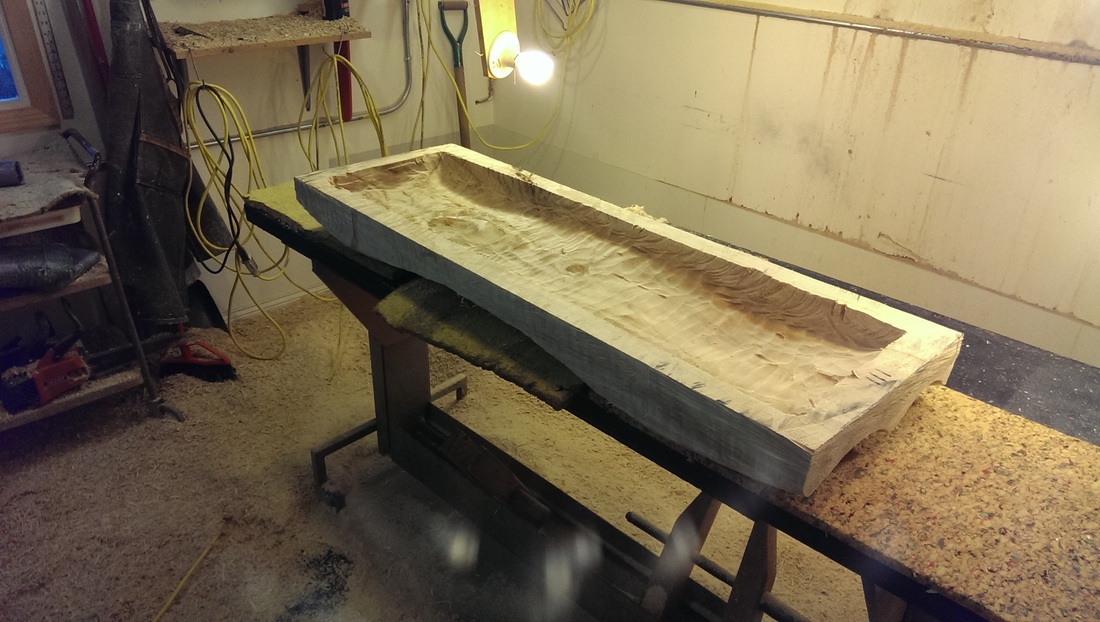 Repeat three times and the rough carving is complete! 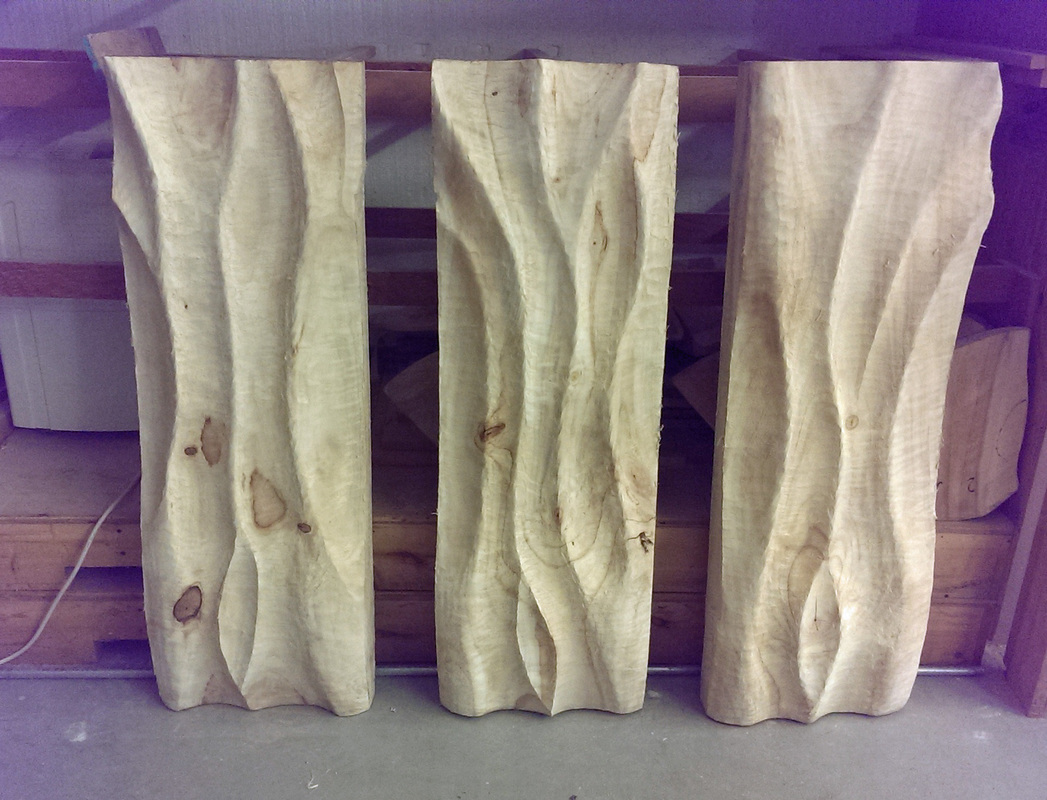 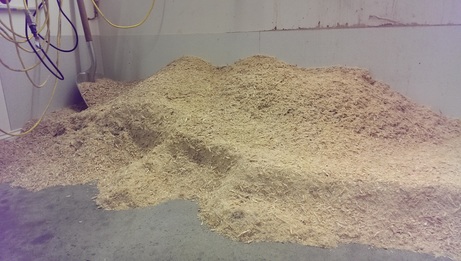 This is what approximately 250#s of carving chips looks like. The panels themselves still weigh in at about 120# a piece. 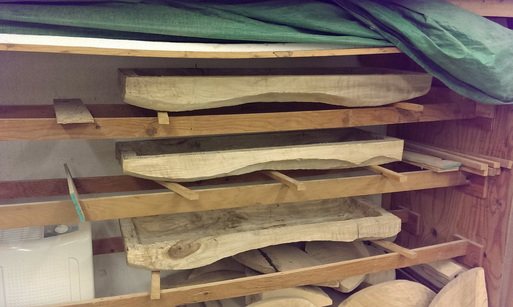 Into the dehumidification chamber for drying. The green tarp is dropped over the front; the heat from the dehumidifier's condenser along with a circulating fan will draw the moister out of the panels. I'm very aggressive on the drying in an effort to force any potential cracks out "on my watch". Moisture content on the panels is initially about 50%. The panels are now dry enough to proceed to the final shaping and sanding. Anything below about 12% moisture content is deemed "cured".  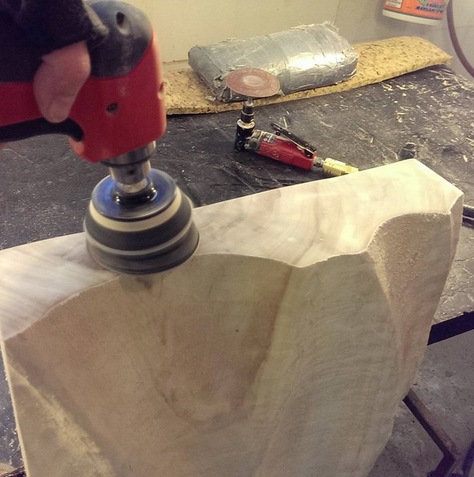 Sand Sand Sand Sand Sand Sand Sand Sand 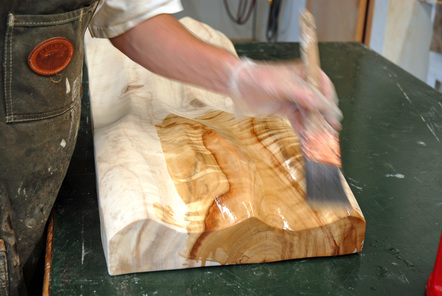 Applying the first coat of oil is one of the most satisfying steps of the entire process. My penetrating finish is a combination of oils and resin. The oils penetrate the wood which enhances the grain and color; the resin locks the oil into the wood so it won't dry out and require any additional coats of oil in the future. 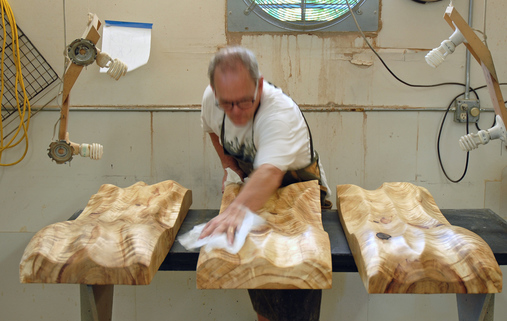 The Sirens are getting their final hand-buffing prior to wax. Wax on.... 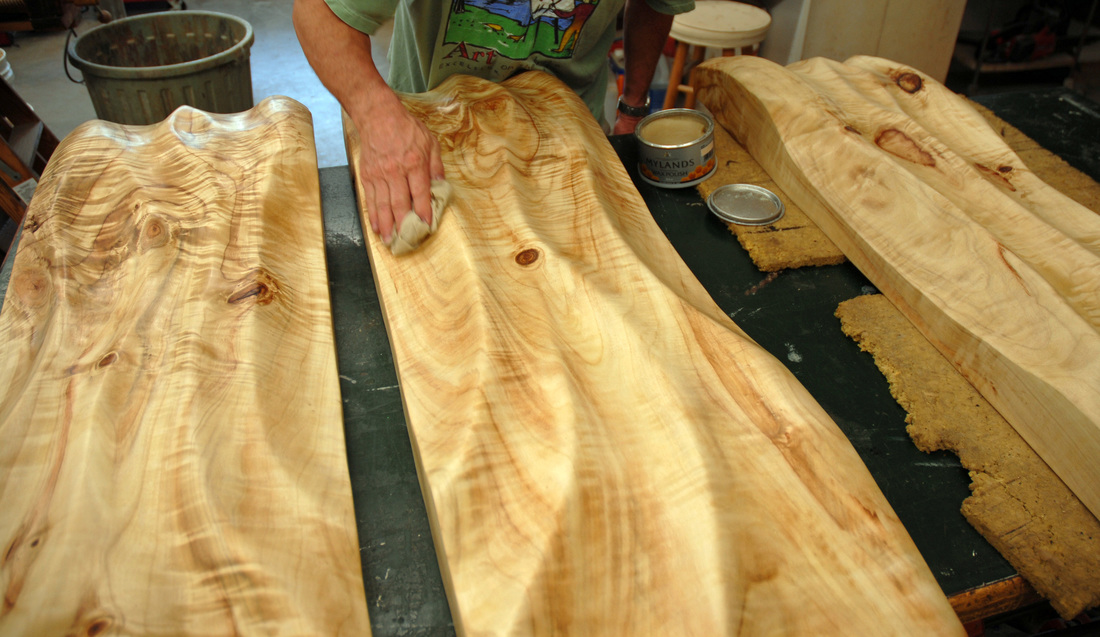 Wax off... 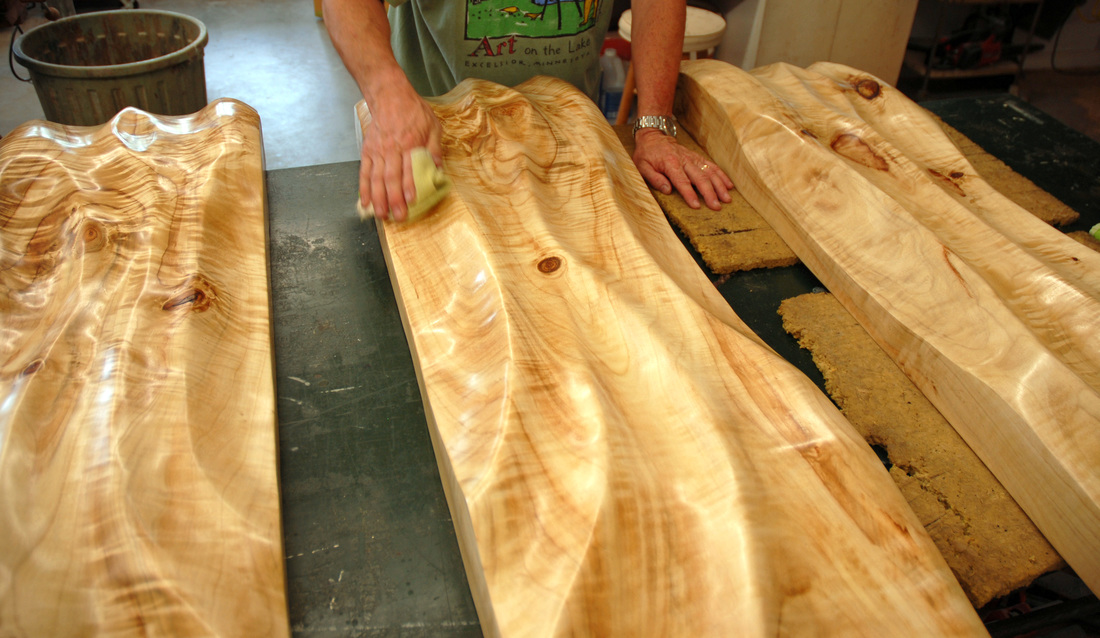 Now that the panels are carved, dried, and finished it's time to move on to the steel backs. 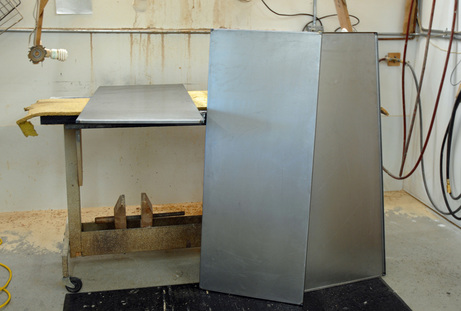 I have my friends over at West Tool & Design in Fergus Falls do the brake work and welding of the 18ga mild steel pans for the panel backs. 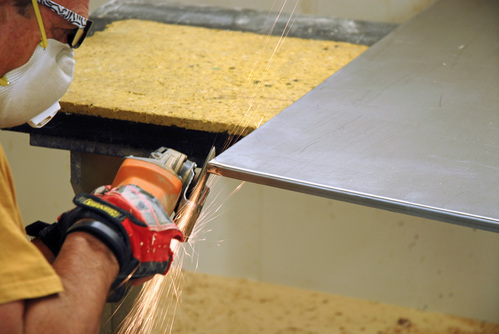 The first step is to grind and clean up the corner welds. 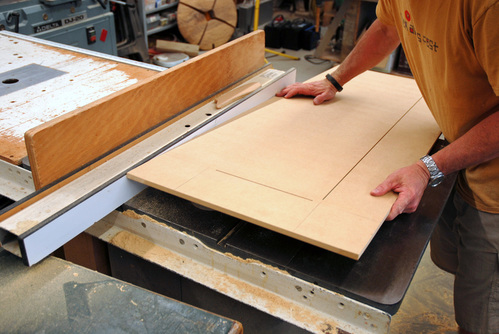 I'm preparing the 1/2" MDF backing boards that will be let into, and reinforce the steel backs. 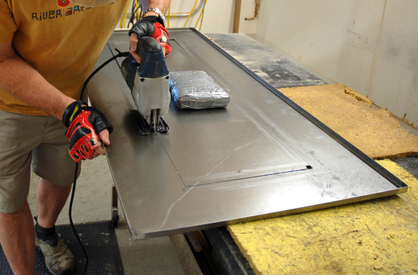 The opening in the MDF fill-board has been traced on to the steel pan and I am now cutting out the corresponding opening in the steel. 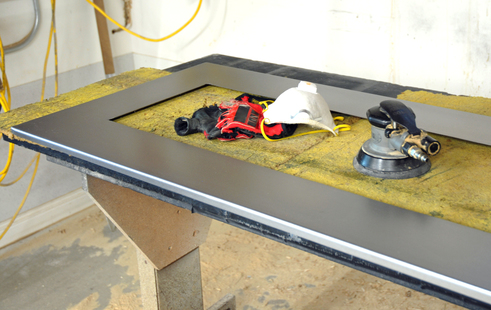 I have sanded and cleaned the front side of the steel backs in preparation for the application of a dark patina. 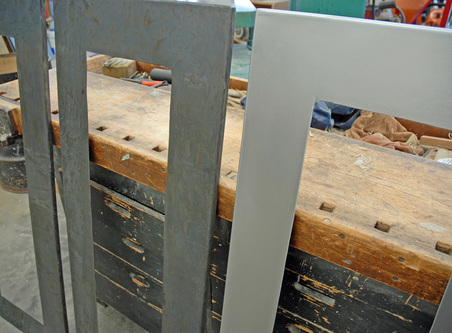 Two of the three backs with patina applied. Sorry, the actual technique for applying my patina will remain a secret. 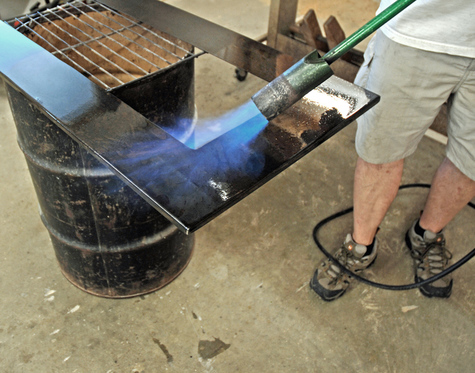 To protect the backs from rust I burn in a traditional blacksmith's wax. It's a combination of beeswax, boiled linseed oil, and turpentine. Wax off...  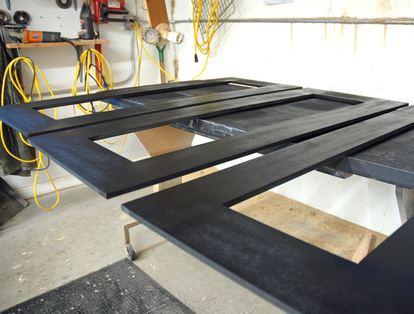 Prior to inserting the MDF filler boards into the steel back I give them a couple coats of matte black paint. 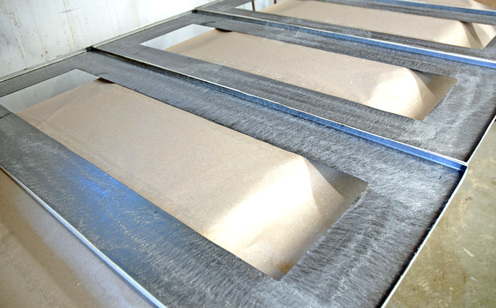 A spray adhesive has been applied to the steel pans and backer boards. 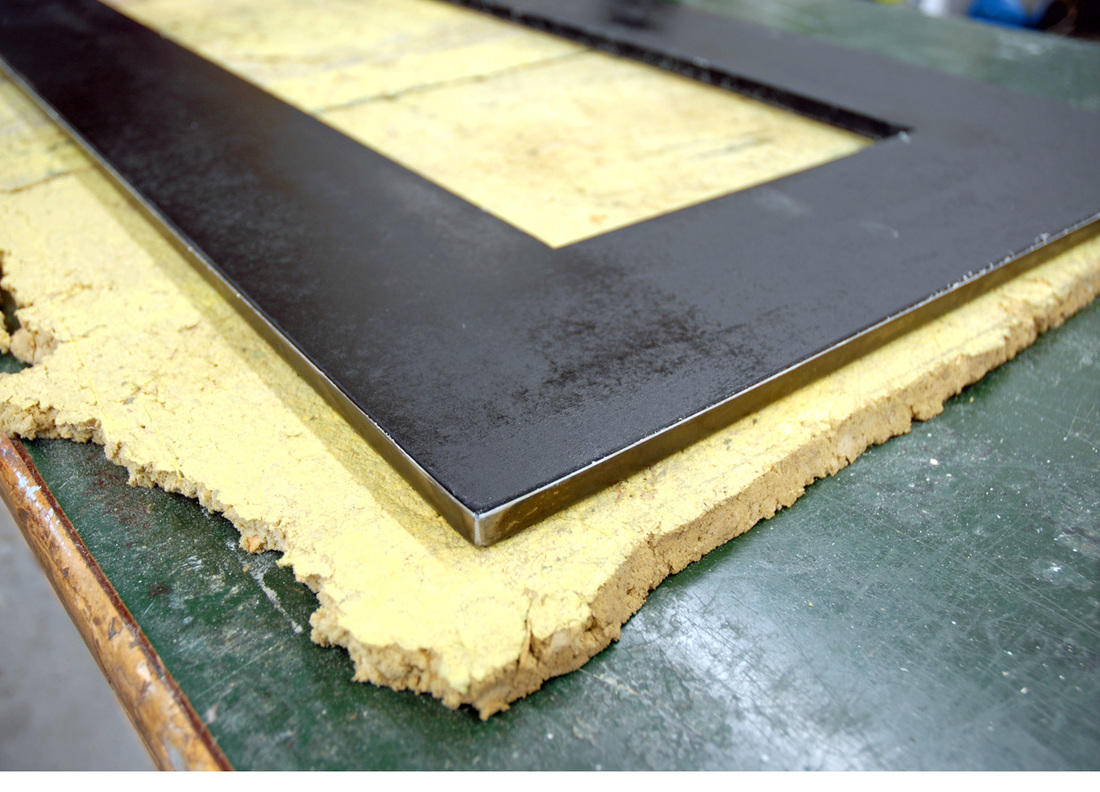 The backs are all set for the panels to be attached. 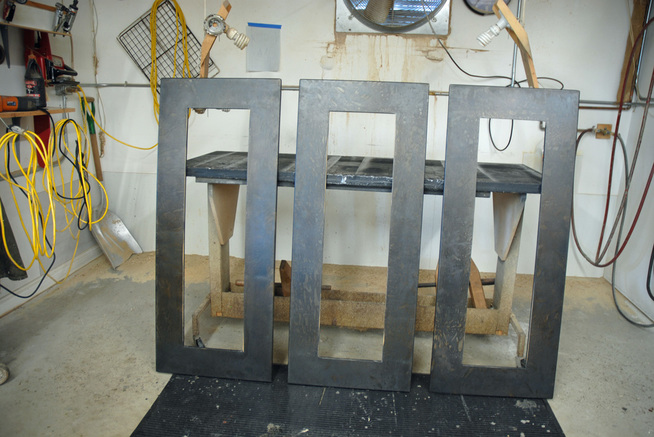 The final step. Attaching the carved and finished panels to the steel backs. 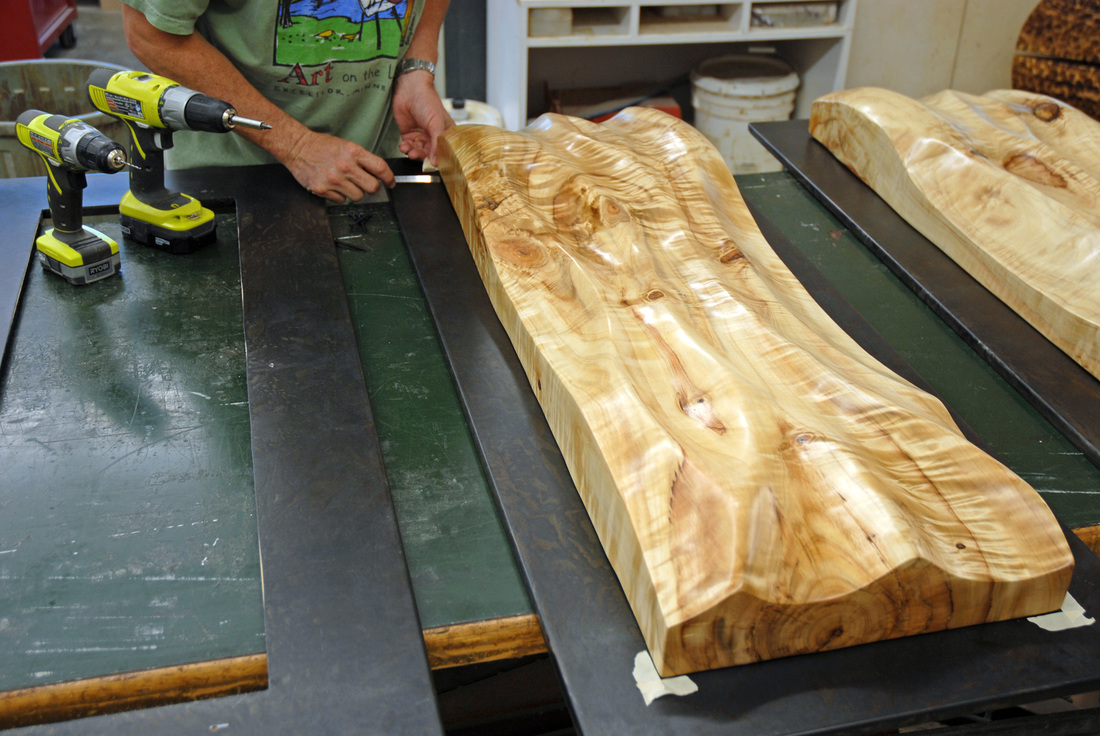 The completed Cottonwood Sirens! 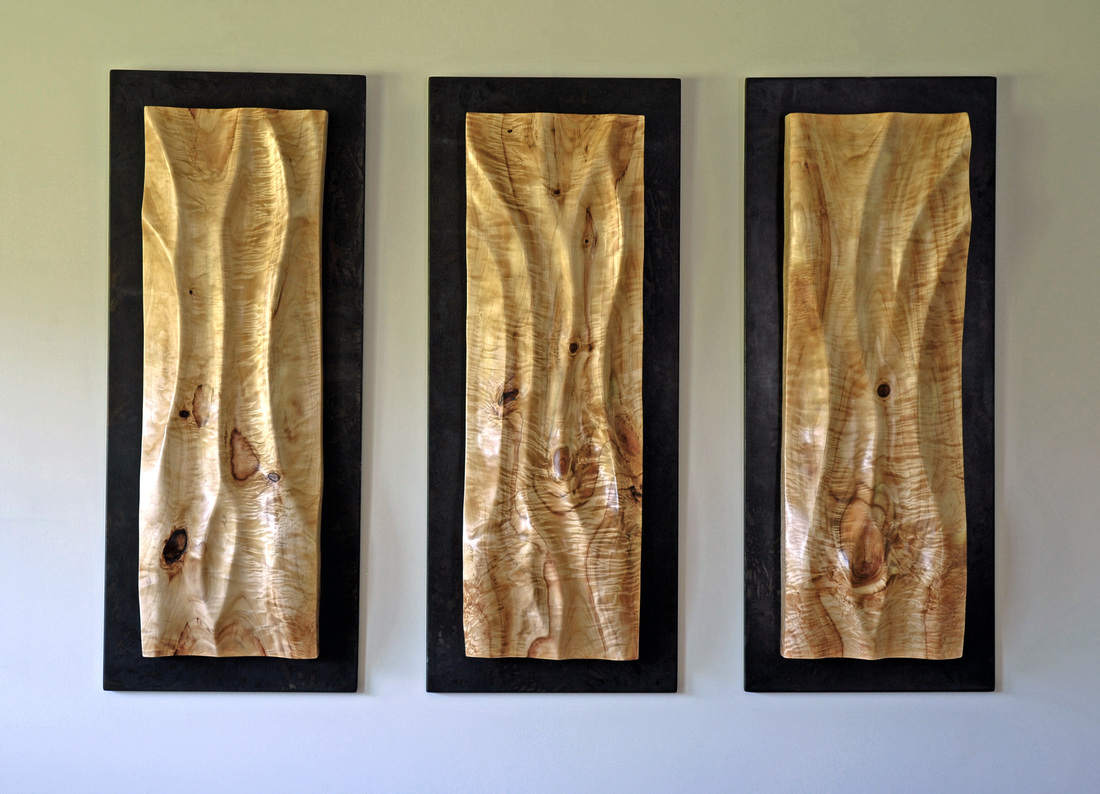 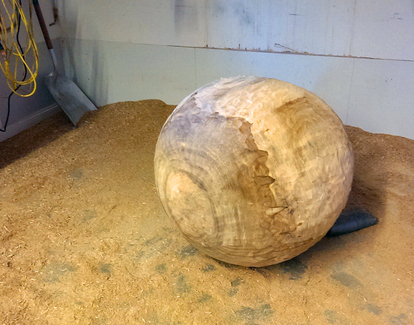 It's been a pretty hectic year of travel but now I'm back decompressing at Wildwood and in the studio until January. This has been a gorgeous autumn weekend in Otter Tail County and no better time or place to carve a ball. I've been wanting to carve a large ball for a long time. The objectives were simple: freehand carve a ball as large as a given log will allow without the aid of any measuring tools or templates. Just my eyes and hands. 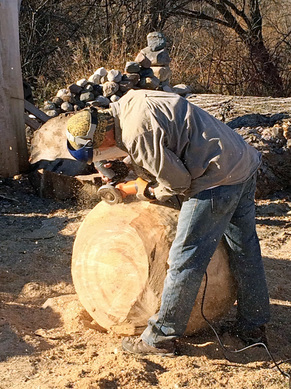 What began as a 950 pound American Elm log ended up a solid 475 pound wooden ball. I remained true to my goals and was pleased that the ball at least approximates a sphere and has a diameter of a mere 2" less than that of its source log. But as with so many things the true value of this activity was the lessons that were reinforced in the process. 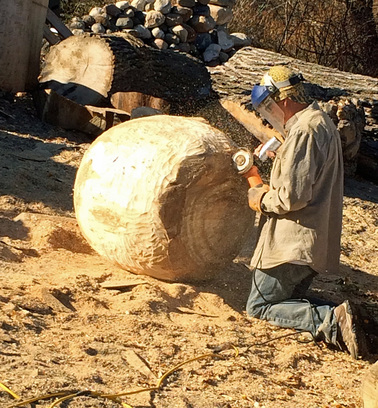 Lesson #1 - The removal of a very small amount of material can have a huge impact on the overall shape. Choose wisely prior to removing or altering a form, it can't be put back. Lesson #2 - Know when to stop. It's critical to determine what is "perfect enough". This is a judgement call which becomes easier the more you do it. The alternative is to keep striving for "absolute perfection" and ending up with nothing. And the final lesson: Simple is hard. Achieving simplicity can be a very arduous journey. 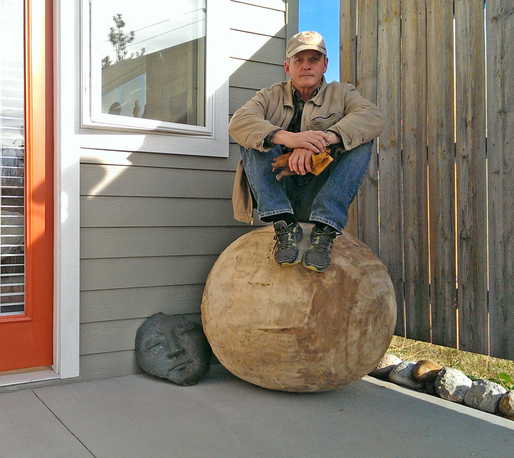 I just finished carving a major wall piece. Here's a photo journal of the process that I think you may enjoy.  The process begins with sourcing some logs from a downed tree. In this case it is a cottonwood that was taken down for a road improvement project about 3/4 of a mile North of my studio.  I was able to cut quite a few slabs from these trees. There are many times that I'm not nearly as fortunate. Often there are only a couple of pieces that meet my requirements out of any given tree. Now it's a matter of deciding just what will become of them. 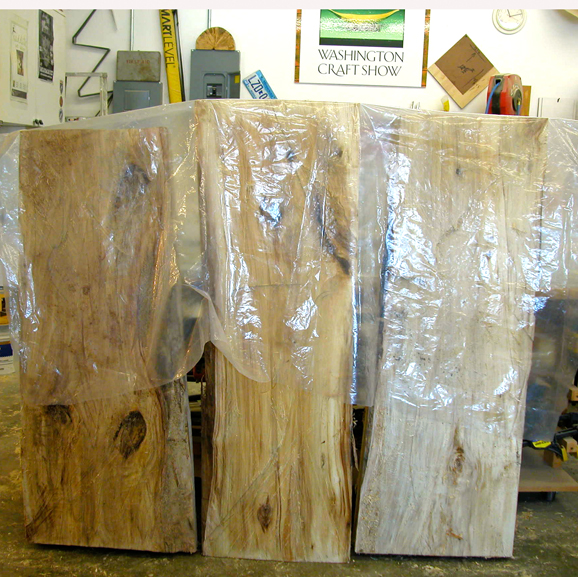 After selecting three blanks for carving they must remain covered with plastic sheeting to prevent them from shrinking/cracking before they are carved. In this present "wet" state each slab weighs about 150#. 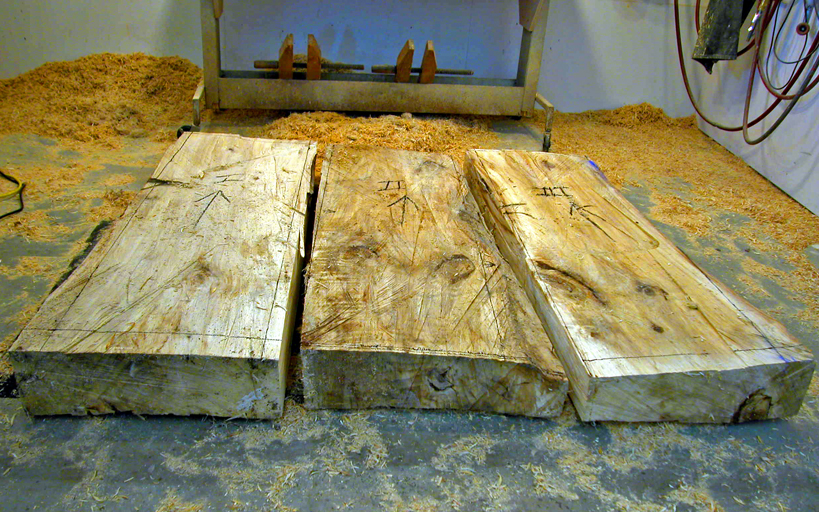 The blanks are now trimmed, squared, and sequenced. 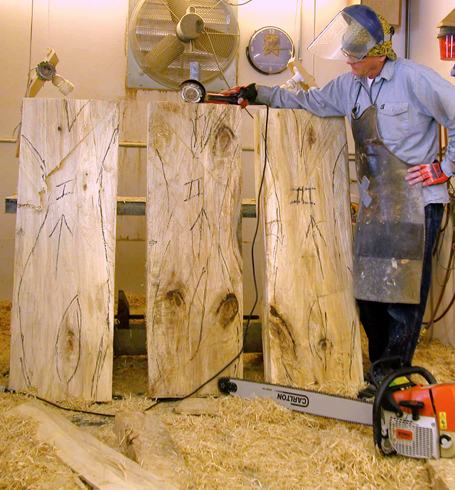 The orientation and proposed forms have been marked onto the slabs. The pieces are ready for carving.  This is what about 300# of wet wood chips looks like. I have carved away nearly 100# of material per slab to reveal the desired form and relieve the backs. 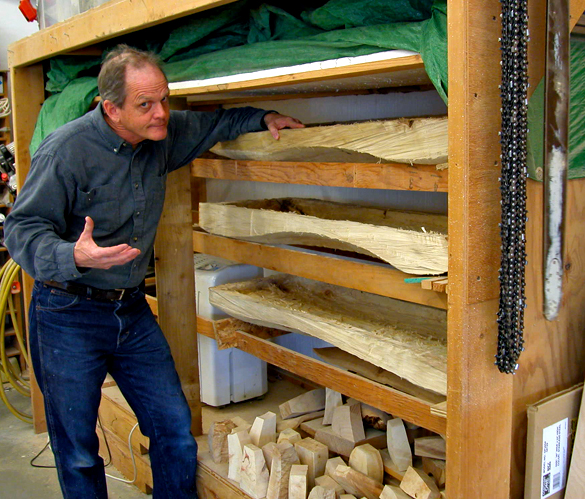 The panels are now carved and about to get closed into my dehumidification chamber for drying. Nothing to do now but wait, kind of like watching paint dry or waiting for water to boil. 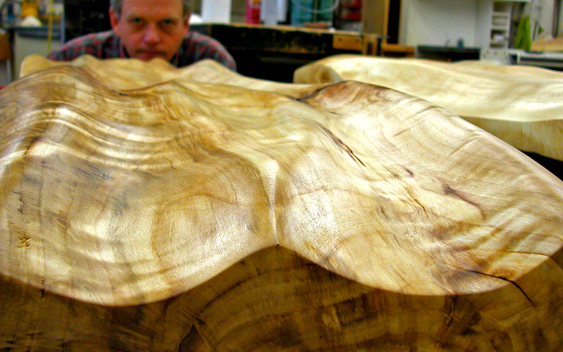 After drying I refine the carving, sand, oil, and wax the panels. At this point they are ready to be mounted on their steel backs.  The mild steel backs are cleaned and prepared for the application of a patina which will yield a dark mottled appearance that brings some great visual contrast to the triptych. 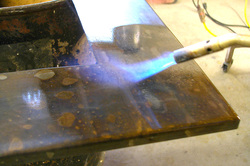 Here you are able to see the patina that I have applied to the steel backs. I am now burning in a blacksmith's wax to protect the backs from oxidation and the elements.
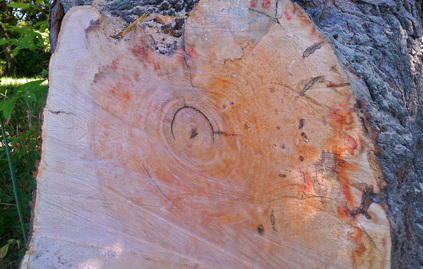
I find myself in many conversations involving the use of exotic woods. At times it seems as though I'm in a "Who can Stump the Wood Guy" competition. Having worked with wood for my entire career and holding a degree involving wood technology I guess I should be aware of more exotic woods than most. However there are in fact many, many more wood species that I am not familiar with nor ever will be. And that's OK with me. Exotic woods by definition are "...of foreign origin or character; not native; introduced from abroad..." The truth be told I have never been the least bit interested in using materials that are not native to where I live and work. Having said that, I must remind you that all the beautiful woods I gather locally are indeed considered "Exotic" everywhere else in the world, so I suppose when viewed from a global perspective I do indeed work with exotics. I'd like to introduce you to three of my favorite Otter Tail County Exotics: 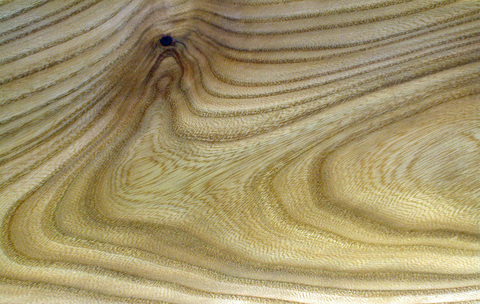 American Elm Ulmus americana This is one of the few woods I use that also has value as a furniture wood or for commercial lumber. I like the strength of the grain pattern. It's strong but not overpowering. Of particular interest is the fine wavy pattern in the summer growth (space between the rings). This herringbone pattern makes this specie shimmer. 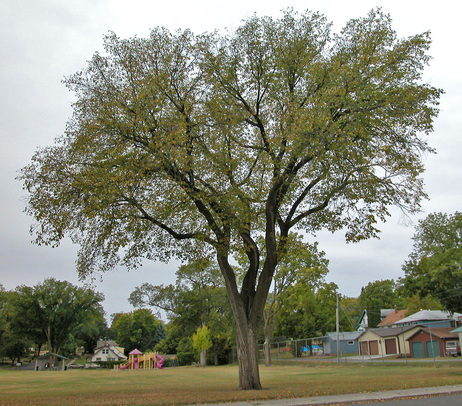 The broad, uniform canopy has made the American Elm a favorite urban tree valued for its shade in yards and parks. 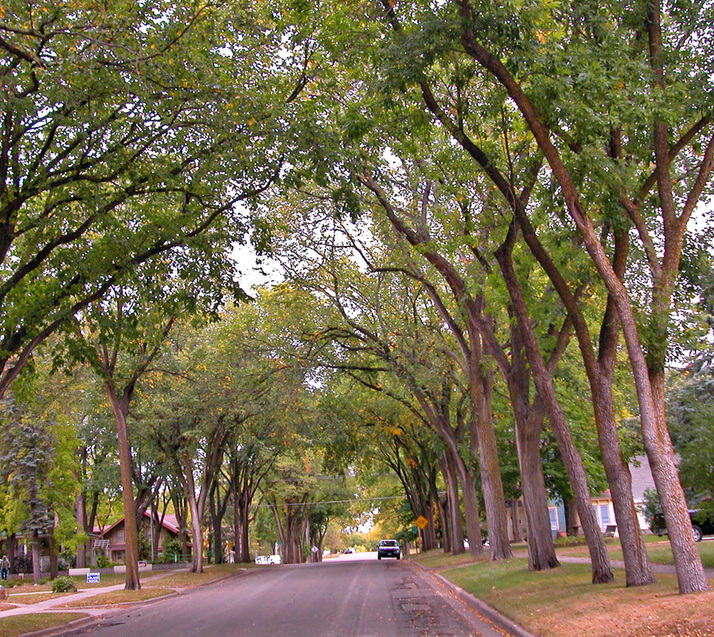 The American Elm has been a favorite for lining boulevards. These Elm tree-lined streets are fast becoming a thing of the past as Dutch Elm Disease (named for where the disease was first located not the specie) continues to decimate the Elm population. 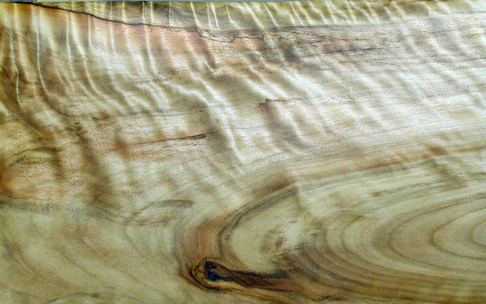 Cottonwood Populus deltoides Cottonwood has very little commercial value due to its low strength, density, and tensile attributes. It's often used for low value items such as pallets and lath. It is one of my favorites. The flame grain that I find in the cottonwood takes my breath away. 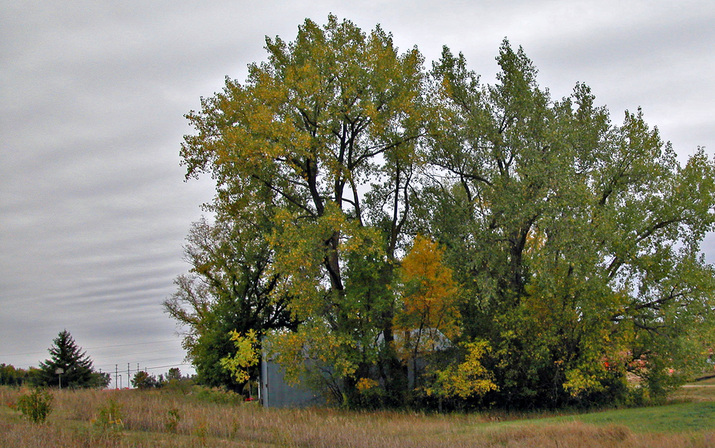 An incredibly graceful tree, I have measured local specimens with 6' diameters. The slightest breeze will produce a beautiful rustling sound as the thin, flat-stemmed leaves flutter. 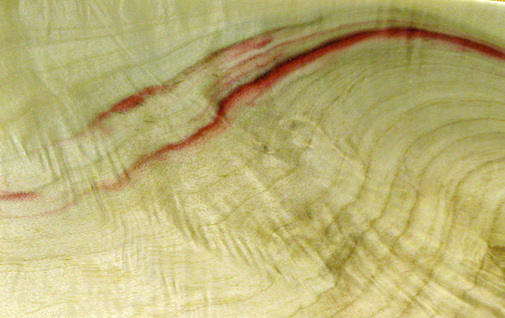 Boxelder Acer negundo Boxelder is a real show stopper. The vibrant dashes of red overlaid on the satiny grain of the Maple is striking indeed. In the rare cases where I carve a piece with no red present the result is almost as though it was made of ivory.
 The red in the boxelder is present as the tree grows. This is a picture of a freshly cut boxelder log. What causes the red will be the topic of a future blog. Hint: Boxelder beetles are non-boring beetles.  I have to say that I prefer knowing where my material comes from. Best wishes - Jay from the very Exotic Otter Tail County 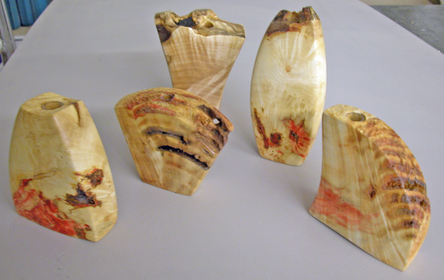 Boxelder and Sugar Maple (left rear). 5" - 8" tall; $100 - $115/vase I started carving vases a few years ago as a means of getting some more color into my display at shows and exhibitions. Fresh flowers bring a lot to the party and are a fabulous compliment to my natural forms. It was a perfect solution to carve vases to serve this display need and an equally great solution to find a use for some of the beautiful wood cut-offs that were really too beautiful to throw away. Since then I have begun to use the process of creating these small pieces of sculpture as a warm-up exercise for my larger pieces. Much like sketching this is a means of exploring line and form while getting my head in the place it needs to be for carving my larger scale work. So here's a peek at some things from my latest sketch book. 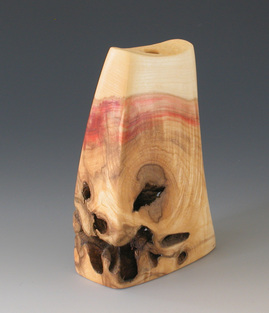 Boxelder Vase, 7" tall - Sold $120 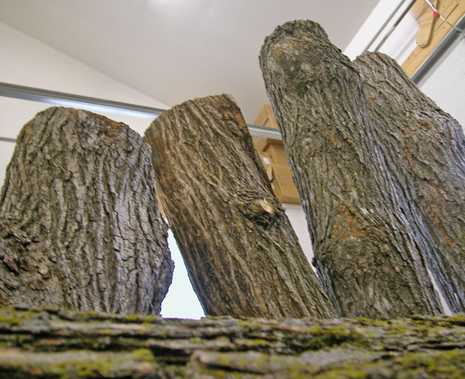 Sugar Maple and Black Willow logs - ready to carve! And now that I'm in the groove it's time to move on to the big dogs. Here's a photo journal of some steps involved in the creation of a wooden vessel. I will use few words and many pictures. The first step is acquiring a log from a locally fallen tree. In this instance it's a Boxelder log that I located at the Fergus Falls' landfill's wood pile (more on that later). 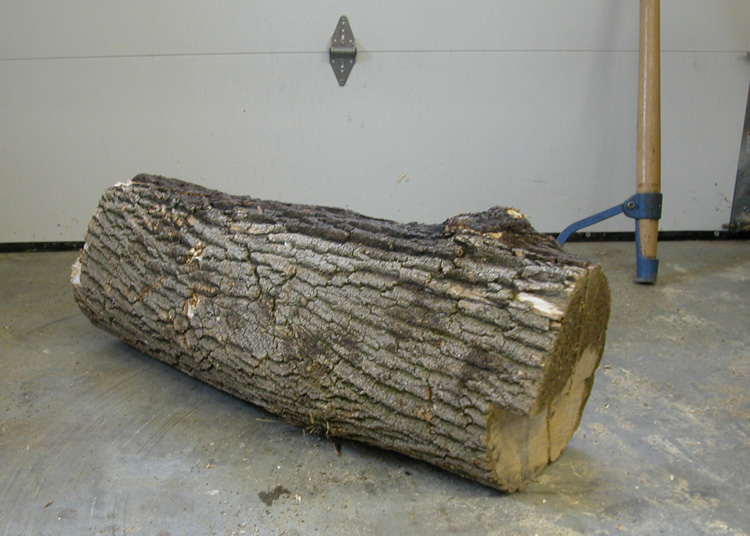 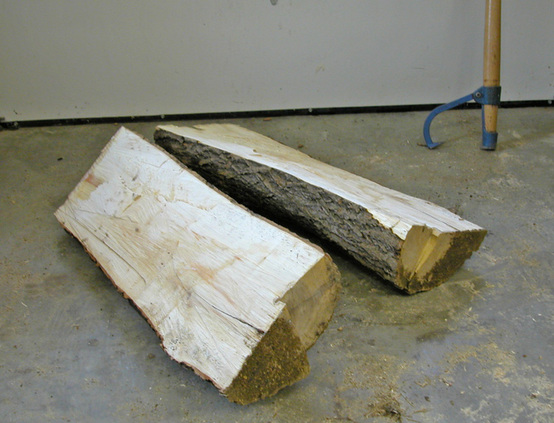 Rip the log down the middle. 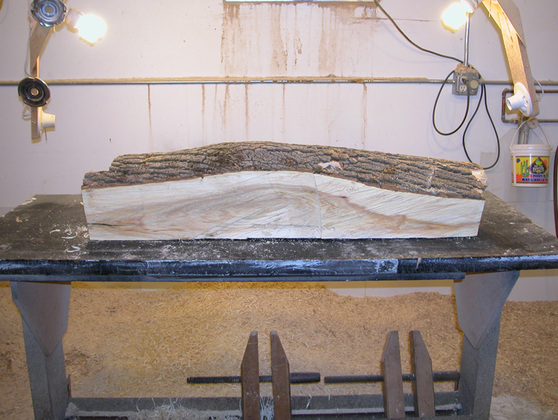 Trim the edges. 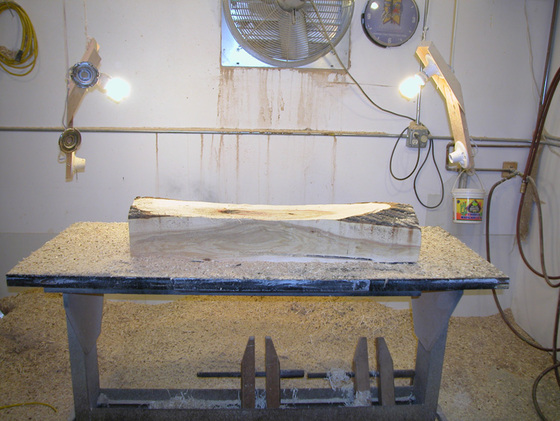 Begin carving the vessel's containment area. 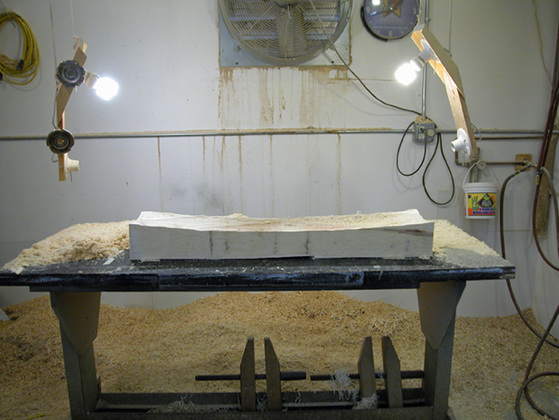 Top side/containment area complete. 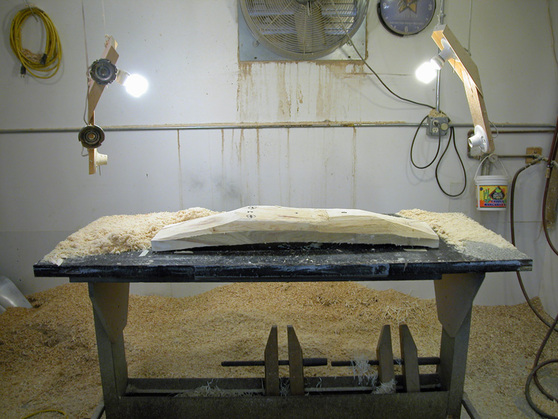 Remove excess mass from underside and mark feet locations. 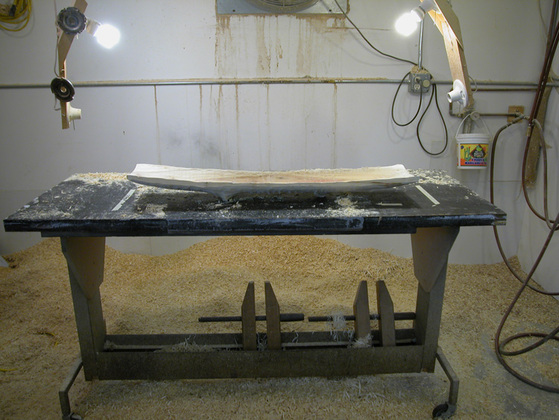 Carving completed. Fast forward through drying; final sanding and shaping; dying of the underside; applying oil; waxing; and...Ta Da, finished piece!  |