
|
Last spring and early summer I recorded a photo journal on my facebook page of what goes in to creating one of my larger wall triptychs. This is a compilation of that journal. I invite you to follow and "like" my facebook page - Jay McDougall - Wood Sculptor.  I'm fast-forwarding to cutting sequenced slabs from a Cottonwood log. About one out of ten logs that I look at in the field are deemed interesting enough to bring into my log yard near the studio. Hauling in a 1 or 2 ton log is far from a casual endeavor, yet until I make the initial cut the mystery remains as to whether any given log is worthy of the time I will be putting into a sculpture. In this case it's evident that I've chosen wisely. I have my large saw (122 cc/8.5hp) fitted with a 54" bar in an Alaskan mill. I will cut 3 sequenced slabs about 6" thick. 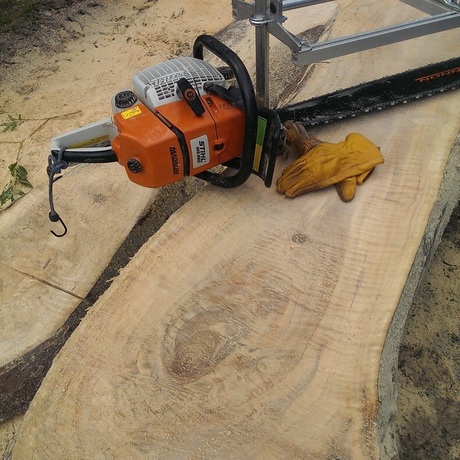 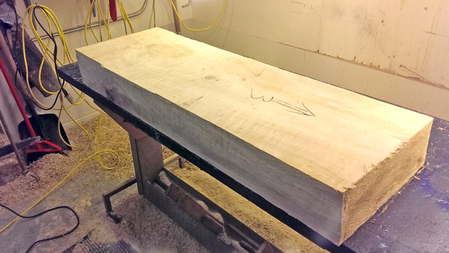 Prior to the slabs being brought in to the bench I square them with a chain saw and mark the orientation and relative sequencing. At this time the slabs are still wet/green and weigh close to 200# each. 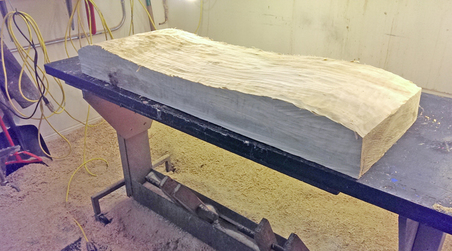 My initial carving establishes the curvature of the Siren's back. Once the curve is carved I strike some very rough lines to guide me in the carving of the figure. 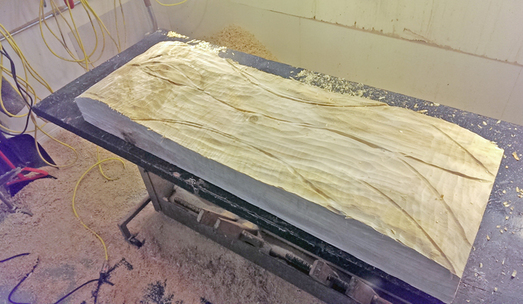 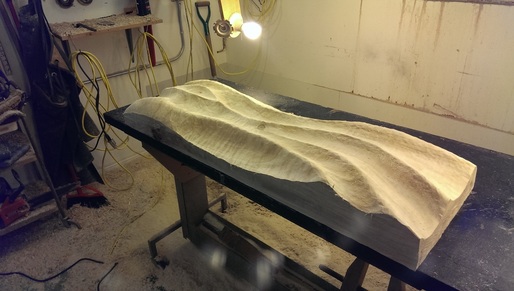 The rough carving is complete on the front of one panel. 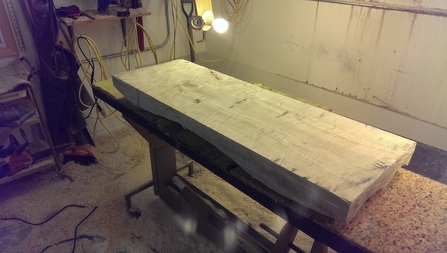 I have flipped the panel over in preparation to carve out the back side. Remember, the panel is still wet at this stage. In order for it to dry with minimal cracking or "curing checks" I must remove some thickness. As wood dries it shrinks. If a slab is too thick the inside can't keep up with the outer layer in drying/shrinking, which results in cracking. 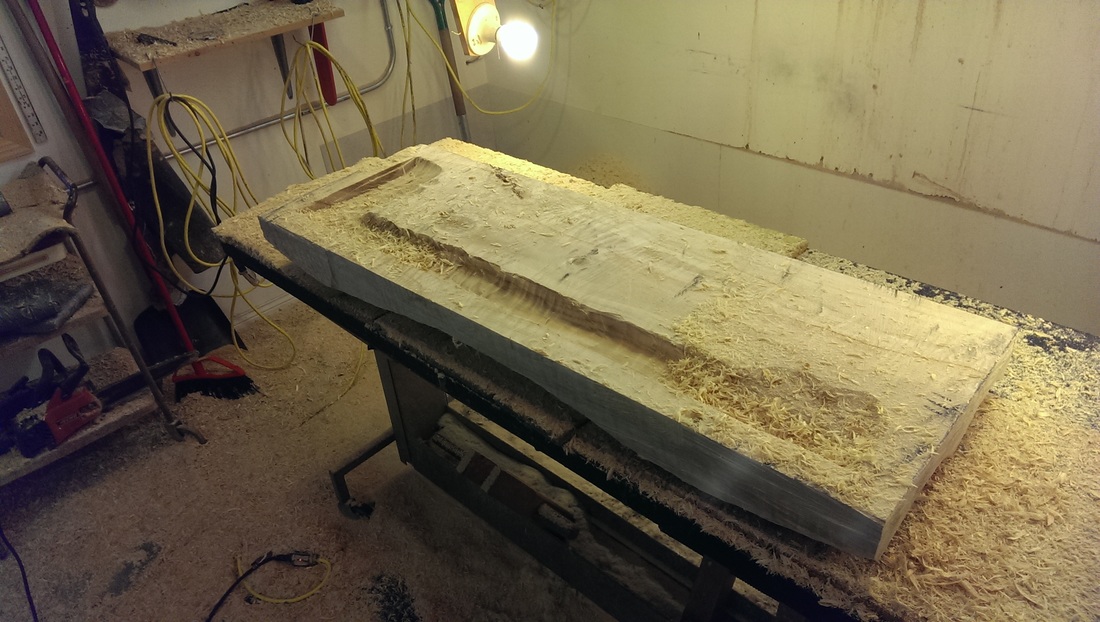 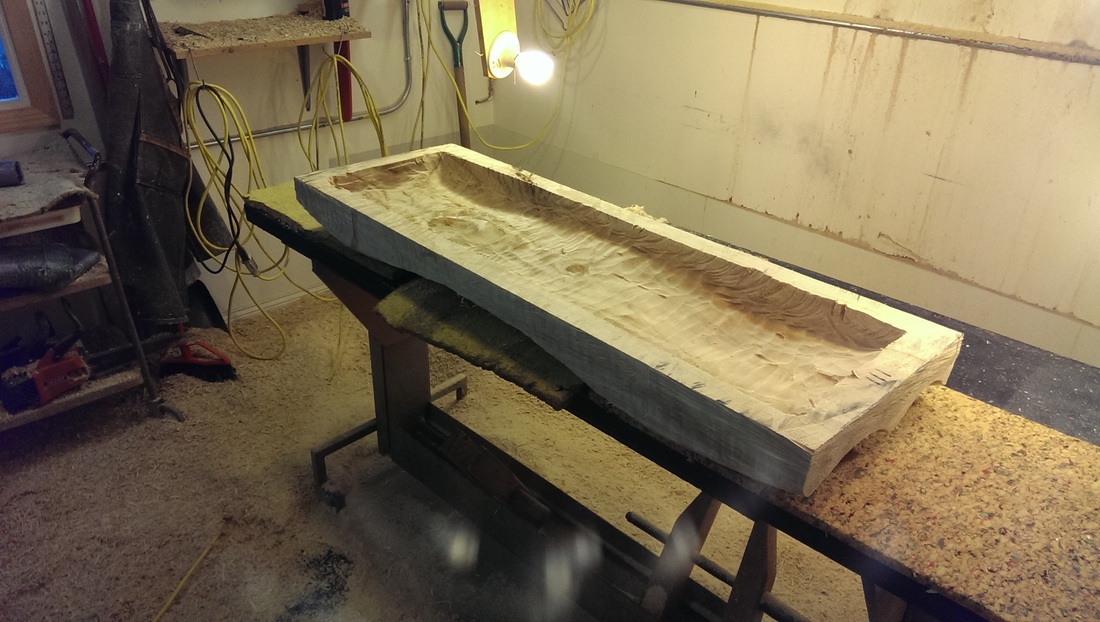 Repeat three times and the rough carving is complete! 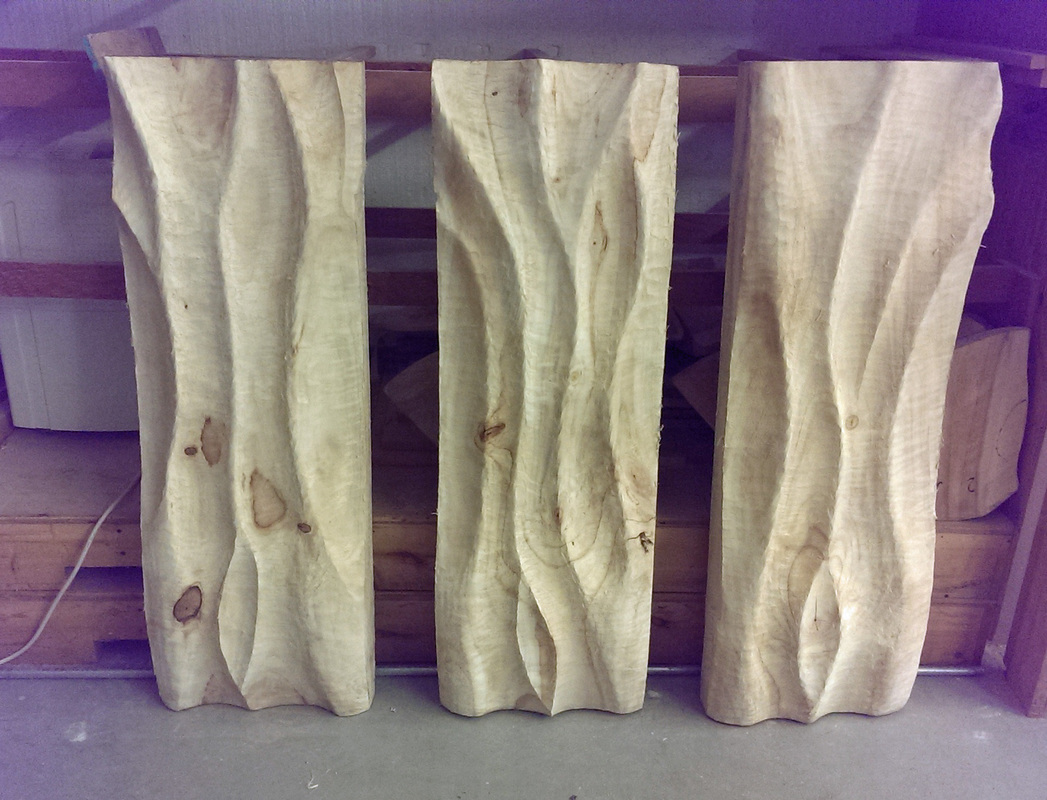 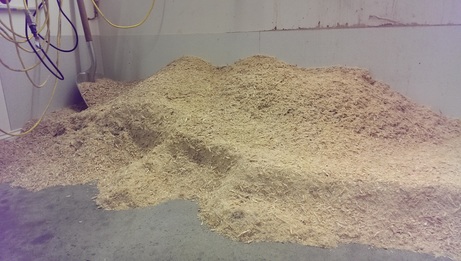 This is what approximately 250#s of carving chips looks like. The panels themselves still weigh in at about 120# a piece. 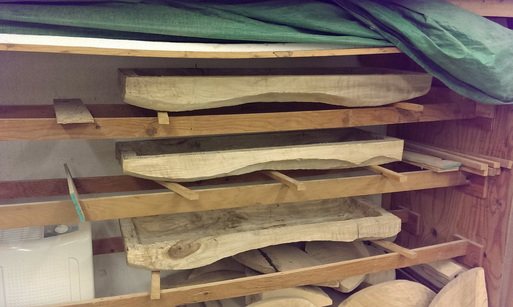 Into the dehumidification chamber for drying. The green tarp is dropped over the front; the heat from the dehumidifier's condenser along with a circulating fan will draw the moister out of the panels. I'm very aggressive on the drying in an effort to force any potential cracks out "on my watch". Moisture content on the panels is initially about 50%. The panels are now dry enough to proceed to the final shaping and sanding. Anything below about 12% moisture content is deemed "cured".  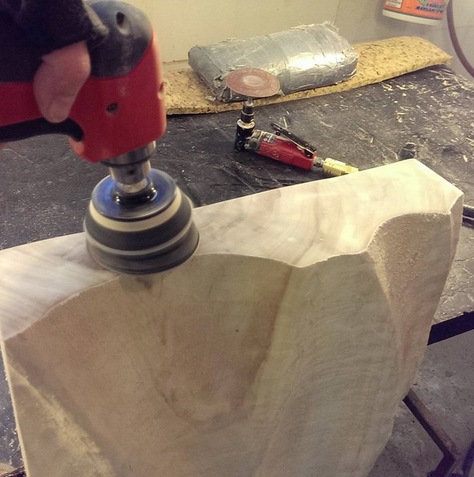 Sand Sand Sand Sand Sand Sand Sand Sand 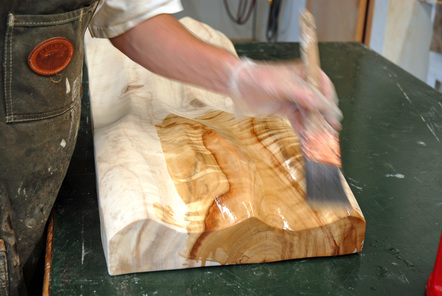 Applying the first coat of oil is one of the most satisfying steps of the entire process. My penetrating finish is a combination of oils and resin. The oils penetrate the wood which enhances the grain and color; the resin locks the oil into the wood so it won't dry out and require any additional coats of oil in the future. 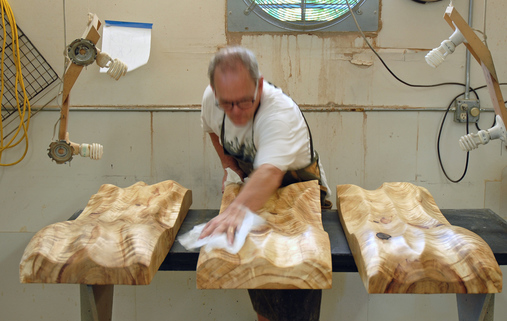 The Sirens are getting their final hand-buffing prior to wax. Wax on.... 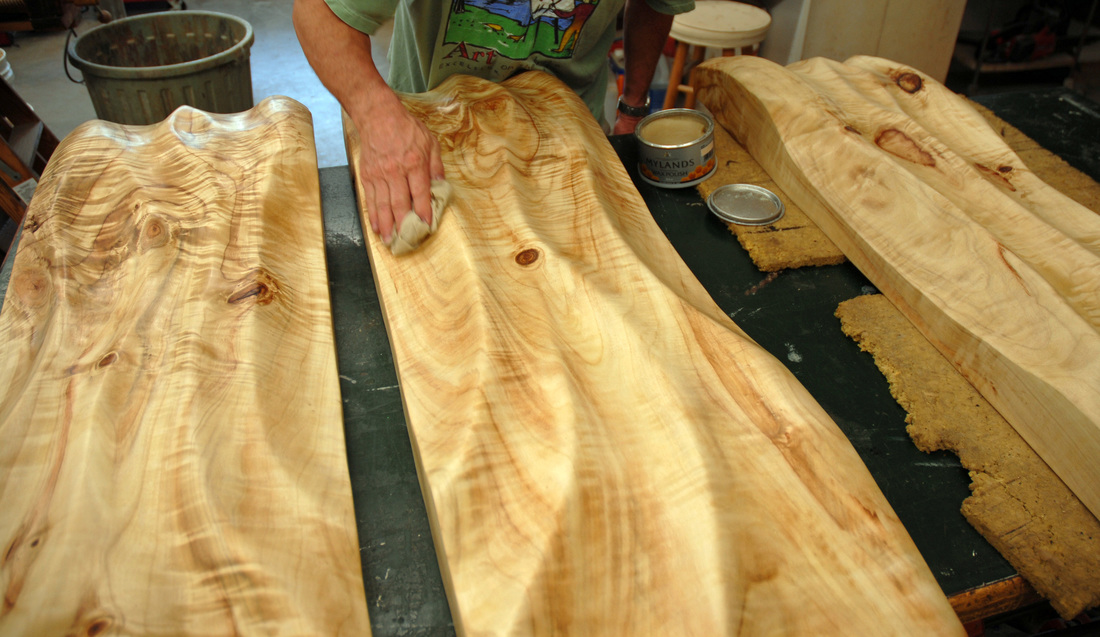 Wax off... 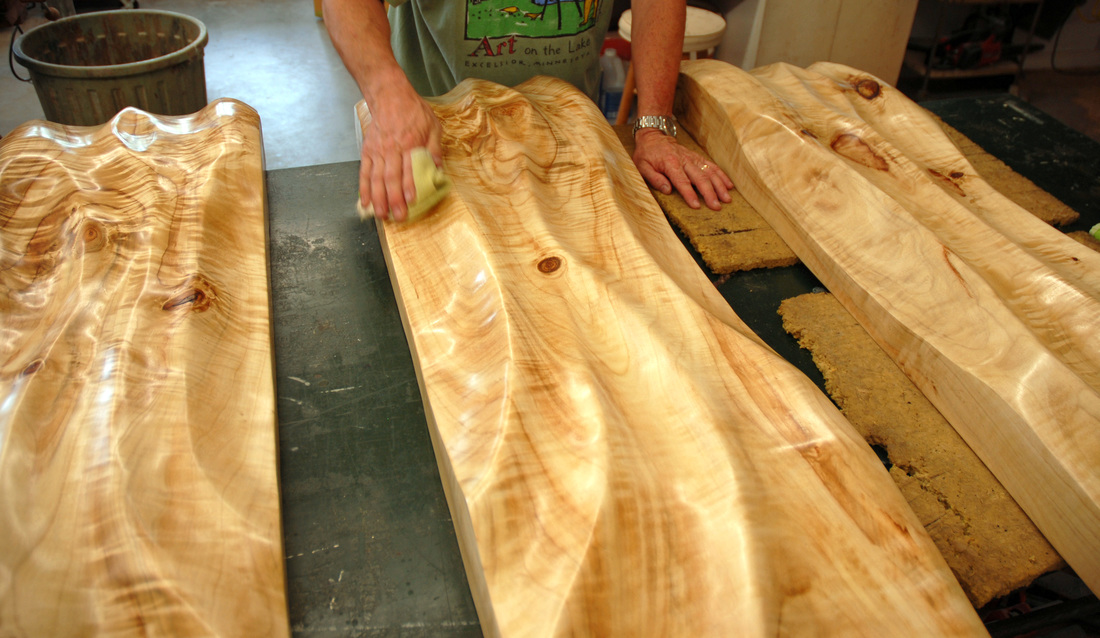 Now that the panels are carved, dried, and finished it's time to move on to the steel backs. 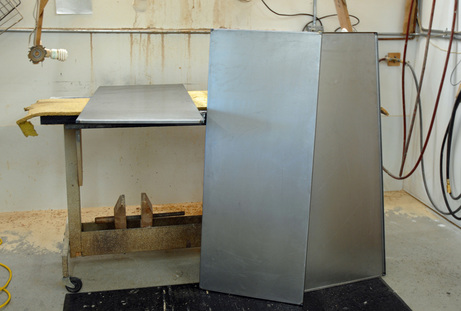 I have my friends over at West Tool & Design in Fergus Falls do the brake work and welding of the 18ga mild steel pans for the panel backs. 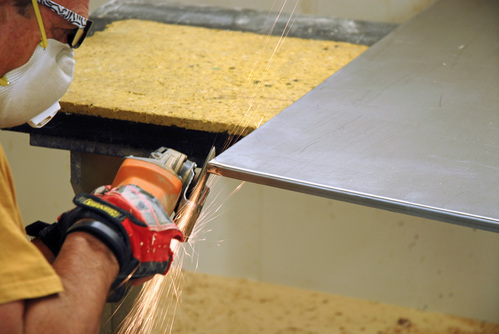 The first step is to grind and clean up the corner welds. 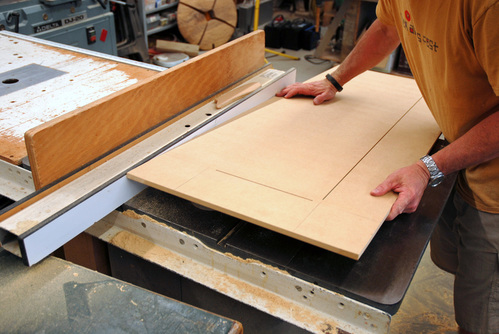 I'm preparing the 1/2" MDF backing boards that will be let into, and reinforce the steel backs. 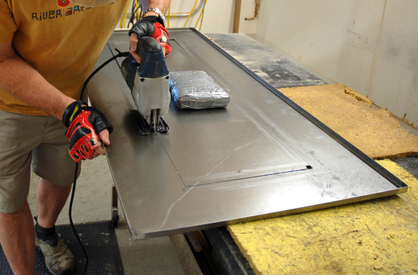 The opening in the MDF fill-board has been traced on to the steel pan and I am now cutting out the corresponding opening in the steel. 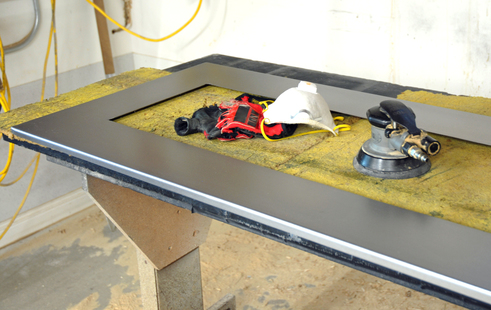 I have sanded and cleaned the front side of the steel backs in preparation for the application of a dark patina. 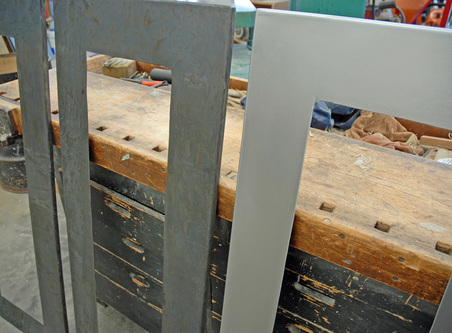 Two of the three backs with patina applied. Sorry, the actual technique for applying my patina will remain a secret. 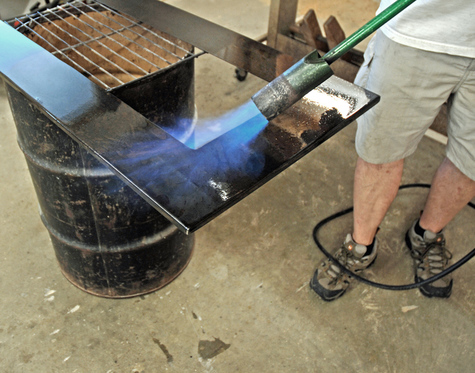 To protect the backs from rust I burn in a traditional blacksmith's wax. It's a combination of beeswax, boiled linseed oil, and turpentine. Wax off...  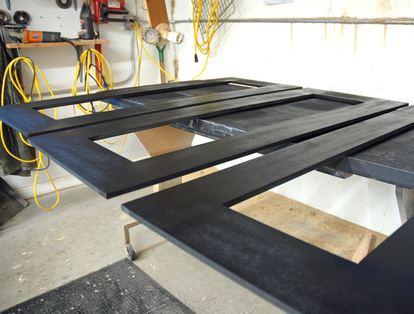 Prior to inserting the MDF filler boards into the steel back I give them a couple coats of matte black paint. 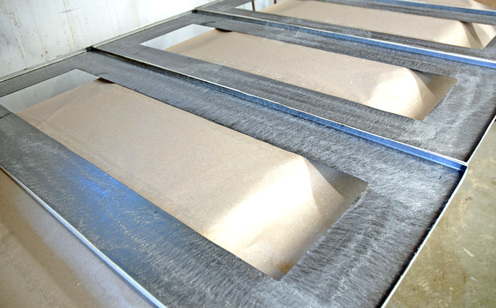 A spray adhesive has been applied to the steel pans and backer boards. 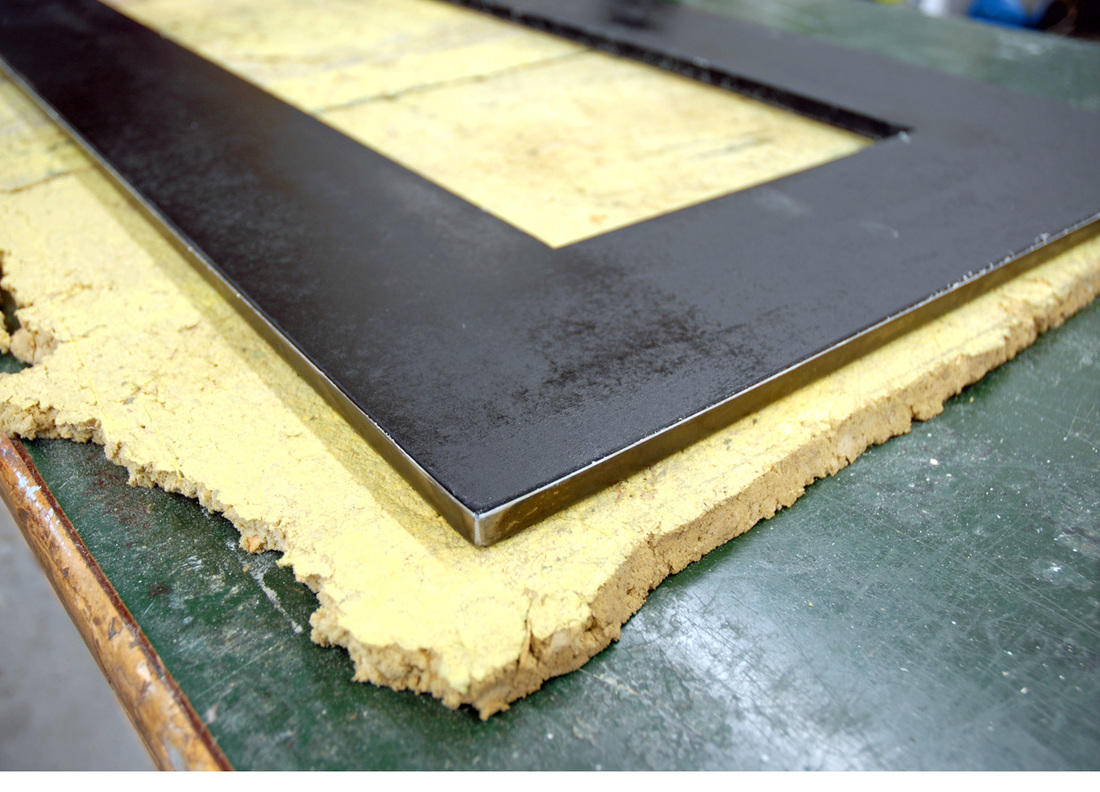 The backs are all set for the panels to be attached. 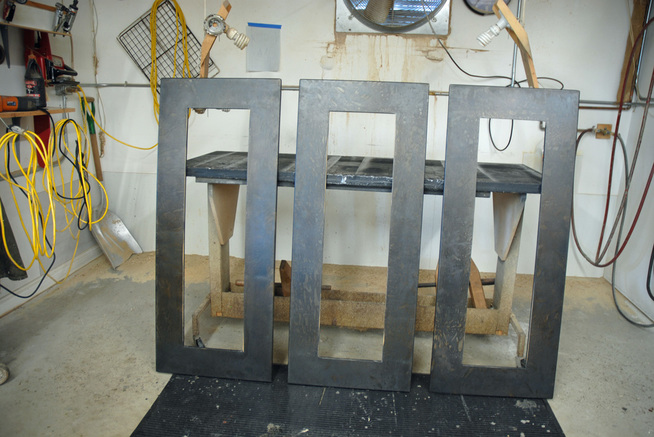 The final step. Attaching the carved and finished panels to the steel backs. 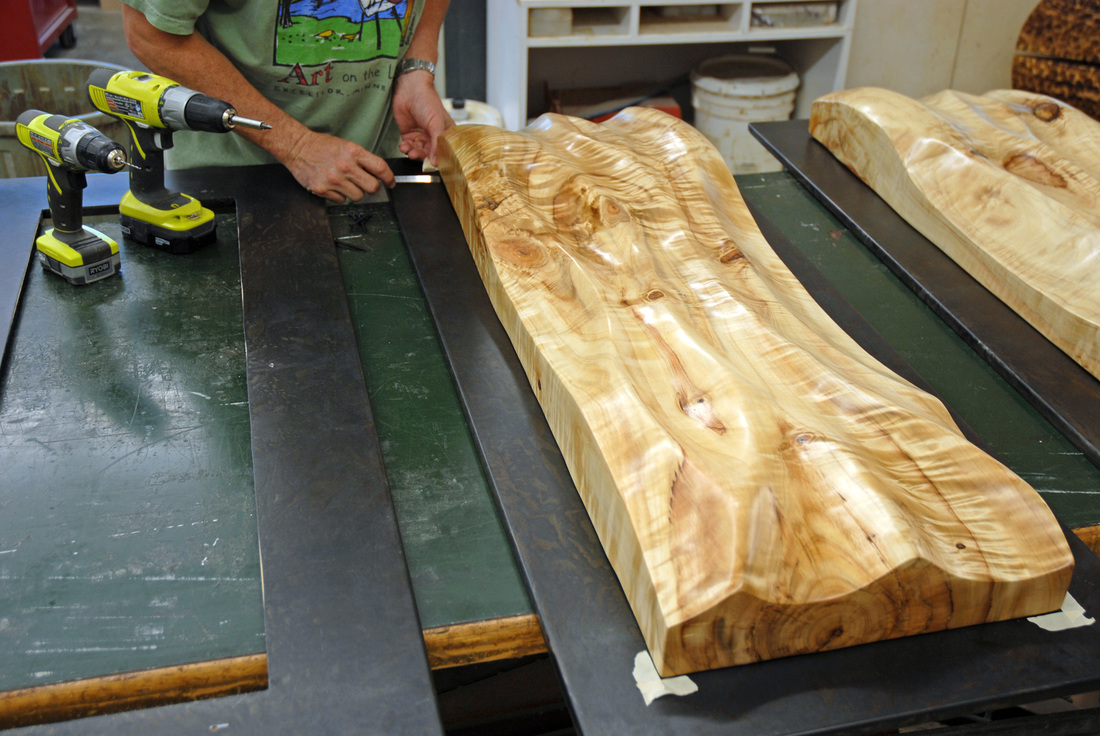 The completed Cottonwood Sirens! 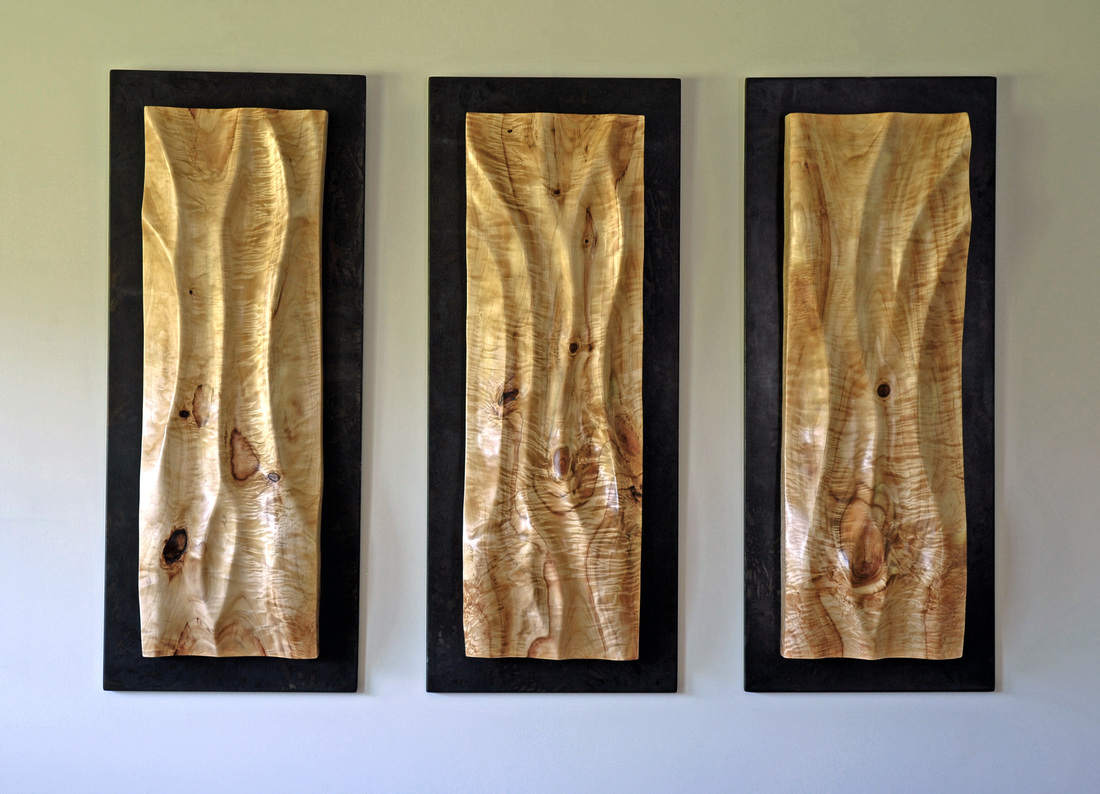
0 Comments
|